Recipes from Marche, Italy

For this entry, I made two recipes. Neither of them were especially good, but I don't blame the people who posted the original recipes or any of the traditions they came from, I blame myself and my propensity for Googling things that might kill me.

Recipes from Marche, Italy: Brodetto

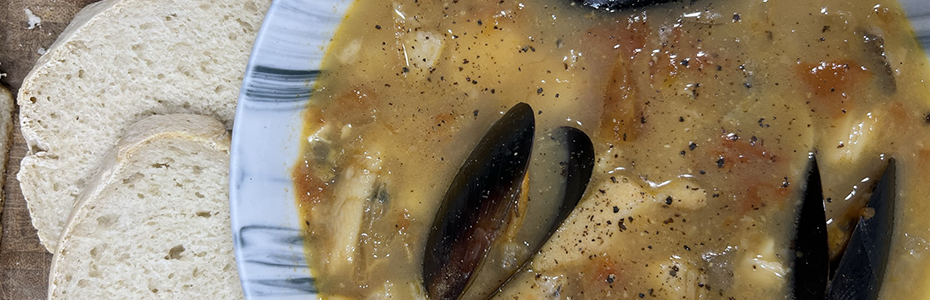
A seafood stew with mussels and clams, minus the Vibrio.

Recipes from Marche, Italy: Filone Casereccio

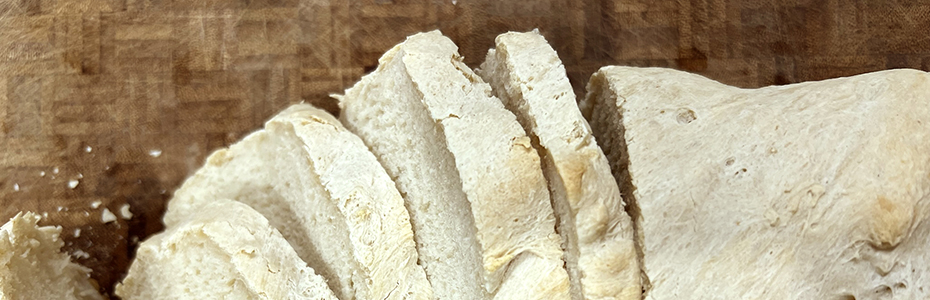
An Italian bread that will come out much better than mine did if you use fresh brewer's yeast and steam.

Recipes from Malta

This is actually the third time I’ve cooked a meal from Malta. The first time, I cooked the meal and then just did not write the blog post. Years went by.

Recipes from Malta: Imqarrun

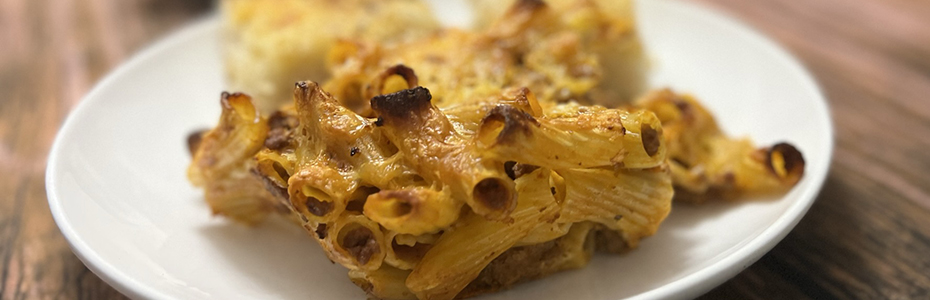
Imquarrum (also called Imqarrun il-forn) is descended from a dish served in Sicily, but the Maltese have adopted it as a traditional staple. The key to making this dish is to be patient.

Wednesday, November 23, 2011

Recipes from Argentina


Recipes from Argentina
This week I am thankful for simple recipes, and for other bloggers.

We're hosting Thanksgiving again this year, so I guess I don't have to tell you that I have a million things to do before tomorrow. So what I really needed was either a week off from blogging or a some really, really simple, easy-to-find recipes.

As luck would have it, my next country is a nation of 40 million people who appreciate food. Argentina is the biggest Spanish-speaking country in the world (by land area) and the third-largest economy in Latin America. It was also one of the founding members of the United Nations. Here it is on the map:
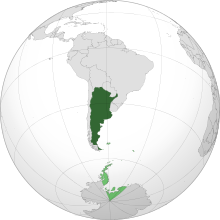
Argentina: the largest Spanish-speaking nation in the world.


(Notice the light green areas there on our old friend Antarctica? Argentina once had land claims in Antarctica, which were suspended by the Antarctic Treaty of 1961.)

In addition to being a major economy in South America, Argentina is also considered a major world economy. Much of its prosperity comes from agriculture (the tallgrass prairie ecosystem in central Argentina, known as the humid pampas, is considered one of the most agriculturally productive regions in the world). Seven percent of the population works in agriculture, and more than half of Argentine exports consist of processed and unprocessed agricultural products such as soybeans, wheat, flour and maize.

As far as cuisine goes, Argentina is probably best known for its beef. Which brings us to our first recipe:

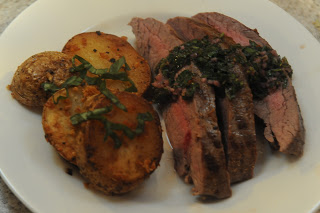
Steak with Chimichurri

For the steak:
  • 1 1/2 lbs flank steak
  • 2 tbsp olive
  • Salt and pepper

For the Chimichurri:

  • 4 tablespoons lemon juice
  • 1/4 cup red wine vinegar
  • 1/4 cup red wine
  • 2  cloves garlic, minced
  • 1/2 teaspoon salt
  • 1/2 teaspoon freshly ground black pepper
  • 1/4 cup chopped fresh oregano
  • 1/4 teaspoon red pepper flakes*
  • 1/4 extra-virgin olive oil
  • 1/2 cup minced fresh flat-leaf parsley

Chimichurri is often (if not always) served with beef and other kinds of meats, making it one of the most popular condiments in the country.

Argentinians, or so I'm told, enjoy potatoes with their steak (just like we do here in the USA), but I had a hard time finding a recipe that was interesting. Most of the recipes I found (when I found them) were just basic potato recipes similar to what I prepare all the time throughout the year. I finally settled on one that was a little bit different, and though I found it on a Spanish-language website called "Recipes of Argentina," I guess I can't really vouch for how traditional or how widely-ejoyed it actually is. Here it is:

Potatoes with Basil
(from The Perfect Pantry)
  • 1 1/2 lbs baby potatoes
  • 1/4 cup butter
  • 3 cloves garlic
  • 8 leaves basil
  • Salt and pepper to taste

There was a third recipe that I couldn't resist: Provoleta, which is basically just a grilled slice of provolone cheese topped with herbs and spices. Even though I really didn't need to complicate things this week, I had to do this recipe ... because, you know, cheese.

Provoleta
  • 1 1-inch thick slice provolone cheese
  • Chopped fresh oregano, to taste
  • 1/2 to 1 tsp crushed red pepper flakes*
  • 1 garlic clove, peeled and cut in half

And finally, you can't take a culinary trip to Argentina without dulce de leche. What the heck is that? It's a sweetened, condensed milk that is a part of pretty much every popular dessert eaten in the country. Of course, it takes several hours to make dulce de leche, so I gave myself a pass on doing that (given that it's Thanksgiving week) and I bought it in a can. In my defense, Argentinians don't seem to have anything against dulce de leche from a can.

Here's the recipe I made with my canned dulce de leche:

Milhojas de Dulce de Leche (Dulce de Leche Napoleans)
  • One package puff pastry, thawed 
  • 1 cup dulce de leche
  • 1/2 cup powdered sugar

*A note about the red pepper flakes used in these recipes: Argentinians use a mild red pepper flake called Aji Molido, which is difficult to find in the US. Argentinian food is typically not spicy, so using a typical US red pepper flake is technically not authentic.

Now before I go any further, I have someone to thank: Rebecca Caro, who blogs at From Argentina with Love. Rebecca's website has hundreds of Argentine recipes, and her blog saved me loads of time by by providing three of the four recipes I used this week: the chimichurri sauce, the provoleta, and the Napoleons.

I began the meal with the potatoes, which have to be roasted and take the most time to prepare. I didn't have baby potatoes, so I just used thick slices.

First melt the butter in a dutch oven. Note: the recipe calls for a TON of butter. I halved mine and it was still a lot of butter.

Now saute the potatoes in the butter, adding salt and pepper, until they begin to brown.

Saute the potatoes in butter.


Then add the garlic and cook for a few seconds, until fragrant. Then move the dutch oven into your oven, preheated to about 350 degrees.

While the potatoes are roasting, move on to the chimichurri.

Chimichurri ingredients (oops, the olive oil isn't in this picture).


Chimichurri is pretty simple. Just finely chop the herbs, mince the garlic, and whisk all the ingredients together in a small bowl (I used about half the oregano the recipe called for--oregano is a strong flavor and I thought it would be overwhelming to use that much of it).

My chimichurri is probably a little too watery, because I left out some of the oregano.


Now brush the steak with olive oil and season with salt and pepper. Grill over a medium flame until the internal temperature reaches about 140 degrees (the meat will continue to cook a little after you take it off the fire, which will give you a medium rare steak).

The flank steak is simply seasoned with salt and pepper.


To serve the flank steak, cut into thin strips and spoon some of the chimichurri sauce over.

At this point you can check the potatoes. They are done when the insides are soft (just prick with a fork to check). When they are finished, toss with the chopped basil.

Toss the potatoes with chopped basil.


While the meat is resting, you can do the provoleta. Now, this can be a bit tricky when it's just you and four kids at home (Martin was working late). I ended up serving the appetizer with the meal, which meant preparing plates ahead of time, keeping them warm and trying to get everything on the table at the same time, before the provoleta got cold. I was only marginally successful.

The provoleta is also pretty simple. Rebecca from From Argentina with Love has suggestions on how to toast the bread under a broiler (rub with the cut piece of garlic, paint with olive and brown under the broiler). I didn't do any of that, because I was in a hurry. So I stopped at just slicing the bread, and compromised by rubbing the cheese slices with the garlic.

Now heat a cast-iron skillet over very high heat (I used non-stick and it worked just fine) and put the cheese in it. Sprinkle with half the oregano and red pepper flakes and cook until the cheese begins to melt and you can see some brown around the bottom edges. Now carefully flip the cheese (that's the tricky part). Make sure you get all the crispy brown bits, because they are the best part. Sprinkle with the remaining oregano and red pepper and continue to grill until you see those brown edges again. Remove from the pan and serve immediately.

Grilled provolone cheese with pepper flakes and oregano. Yum!


By the way, you will set off the smoke detector when you make this.

Finally, the dessert, which was blissfully simple (when you don't have to make the dulce de leche from scratch). Here's how:

Unfold the puff pastry and slice into thirds, along the fold lines. Then slice each third in two so you have six rectangles. Repeat with the other piece of pastry. Then put the rectangles on a wax-paper lined baking sheet, leaving about one inch between pieces. Bake in a pre-heated 350 degree oven for 12 to 14 minutes, or until pastry puffs up and turns a golden color. Remove and let cool.

Puff pastry ... what could be easier?


Now cut the tops off of each piece of pastry, so the two halves are about equal in size. Make a pile of top halves and a pile of bottom halves. Start by spreading dulce de leche on one of the bottom halves. Then cover with a second bottom half, and spread that one with dulce de leche.

Now top with one of the top halves. Repeat until you've used up all the bottom halves (you'll have several top halves left over). Now dust with powdered sugar and serve.

Three layers of pastry, two layers of dulce de leche.


 Note: the recipe says to use a "generous" amount of dulce de leche, but I found it overwhelming. If I make these again I'll probably use half as much.

This meal was a huge hit with Dylan, though I didn't bother to offer him the chimicurri sauce. He was perfectly happy just with the steak. He ate the potatoes and the cheese, too. Hailey enjoyed the potatoes, Natalie didn't eat anything and Henry ate it all. Martin, when he finally got home, ate his entire meal almost without a word and then said, "They eat well in Argentina."

My poor kids didn't get to try the Napoleons. I really didn't want to deal with a sugar high right before bedtime, so I saved them for me and Martin. Like I said, the liberal amount of dulce de leche I used was pretty overwhelming, but they were still good--though I have to admit eating a whole one made me feel a little off. Way too much richness.

By the way, in case you are a fan of self-inflicted pain, here is the recipe for dulce de leche from scratch (this one comes from Alton Brown):

Dulce de leche
  • 1 quart whole milk
  • 1 1/2 cups sugar
  • 1 vanilla bean, split scraped (optional)
  • 1/2 teaspoon baking soda

Put the milk, sugar, vanilla bean and seeds in a large pot over medium heat. Bring to a simmer and stir until the sugar has dissolved. Then add the baking soda and stir. Reduce heat to low and simmer uncovered, stirring occasionally. If any foam appears on the surface, don't try to mix it in.

After 1 hour, remove the vanilla bean. Keep cooking until the mixture is a dark caramel color, which will probably take about an hour and a half to two hours. You should have about a cup of mixture.

Strain the mixture through an fine mesh sieve and place in the refrigerator.


And that's Argentina! Happy Thanksgiving everyone!

Next week: Armenia.
Thursday, November 17, 2011

Recipes from Antigua and Barbuda


Recipes from Antigua
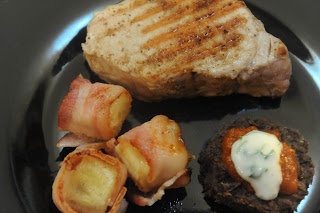
This week we're doing pork chops with bacon. And bananas.

Yes, bananas. If you think that sounds weird, it is (at least by American standards). But even more weird is, we liked it. It was definitely different, but it was good.

First a few notes about the country that spawned this weird-though-palatable recipe: Antigua and Barbuda, the nation so nice they (apparently) named it twice.

Antigua and Barbuda are twin islands located between the Caribbean Sea and the Atlantic Ocean. A number of other smaller islands are also included in this "Land of 365 Beaches," which I guess alludes to the idea that you could spend all year there and go to a different beach every day (personally I think I would get sick of beaches). Around 85,000 people live on Antigua, Barbuda or those smaller islands, which are a bit British in culture, language and governance since they were once, like 95% of the world's small nations (OK I exaggerate ... a little ...), a part of the British Empire.

Antigua and Barbuda. Puerto Rico is off there to the left somewhere.


Temperatures on these two islands range from the mid-70s in the winter, and the mid 80s in the summer, which explains why the British were so keen to have them in their empire. Although really, that's way too hot a summer for my freakishly cold-loving British husband, but I don't think he speaks for all Brits.

Like so many other Caribbean nations, the cuisine of Antigua and Barbuda includes a lot of tropical fruits such as mangoes, plantains and papayas. Salt fish, lobster and other types of seafood are also eaten there, but the locals also like many of the same types of meat that Americans do, such as chicken, pork and lamb. The two "national dishes" of Antigua and Barbuda are fungie, which is a little bit like Polenta, and pepperpot, which is a thick vegetable stew. I chose not to do either of these recipes for a couple of reasons--the first was because I was pretty sure they would be rejected not only by my children but by my husband as well--and the second was because I was pretty sure they would be rejected by me. Some of the ingredients--such as taro root--are also scarce enough that I didn't want to spend time tracking them down for something I didn't think I was going to like (vegetable stews aren't really my thing). Also I won't really get into the part about the pig snout.

The three recipes I did settle on had pretty standard ingredients (although in unusual combinations), which was something I needed after all the work I had to put into nailing down the recipes for last week's post (Antarctica). Here they are:

Pork Chops with Bananas and Bacon
(from The Caribbean Forum)
  • 4 pork chops
  • 3/4 tbsp cumin
  • Salt and pepper (to taste)
  • Juice of 1 lemon
  • 2 tbsp butter, softened
  • 2 bananas
  • 6 strips bacon
  • Beer (optional) 

Black Bean Cakes with Salsa Roja and Cilantro Yogurt
(from Best Cancun Hotel)

For the cakes:
  • 2 cups canned black beans
  • ½ cup finely chopped onion
  • 1 ½ tsp ground cumin
  • 1 tbsp finely chopped jalapeno 
  • 2 tbsp olive oil  

For the salsa:
(from Cook My Way)

(Note: this will make more than you need for the beans, but the leftovers make a great dip)
  • 1 small serrano pepper
  • 5 Roma tomatoes
  • 1/2 a white onion
  • salt 

For the cilantro yogurt:
  • 1/2 cup plain yogurt
  • 2 tbsp chopped cilantro
  • Juice of 1/2 a lemon

And for dessert: Papaya Pie
(from Caribbean Choice)
  • 1 medium pre-baked pie shell
  • 3 ripe papayas (the riper the better)
  • 2 tsp lime juice
  • 1/2 tsp lime zest
  • pinch of cinnamon
  • dash orange extract
  • 4 tbsp flour
  • 4 tbsp sugar
  • 4 egg whites

The pie needs to be served chilled, so that's where I started. The recipe is actually pretty straightforward until you get to the egg whites.

Start by peeling the papayas and removing the seeds. Then mash them up. I couldn't find any really ripe papayas, which will help you during this part of the process (unripe papayas don't mash very easily). If yours are also less than ripe, you can try cooking them on the stove for a few minutes to soften them up.

Mash the papayas. This is easier if they are ripe.

Now add the lime juice, the lime zest, the cinnamon and the orange extract. Mix well.

Add the zest, juice and spices.

Now fold in the flour and sugar (I doubled the amount of sugar since my papayas weren't very ripe, and since papaya isn't really a super-sweet fruit to begin with. At this point, you might want to taste the mixture and adjust the ingredients according to how you like it).

You of course remember how lazy I am about beating egg whites. Well with this pie you can't really afford to be lazy about this part, so I used my grandma's 1960s era mixer for this. Did I mention how much I love this mixer? They don't make 'em like that any more.

So, beat the eggs until bona-fide stiff peaks form.

Now those are stiff peaks!

Now here's the tricky part. Gently fold the egg whites into the papaya mixture. This is tricky because the papayas are so much heavier than the egg whites, and they tend to sink to the bottom. So don't be overly worried if you don't think it's mixing very evenly--it's much more important not to over-fold because then you may fold out too much of the air from the beaten egg whites.

Your mixture will probably look a bit like this: more egg on the top

Now pour the mixture into the pie crust. Be careful because there's a lot of mix, so to make it all fit you might have to pile it up a little.

Ready for the oven.

Now, the original recipe said to bake for 25 minutes, "or until top is just brown." It neglected to tell me what temperature to bake at, though. Since this recipe is a little bit like a meringue, I figured on a slightly lower temperature and I put it in at 325 degrees. After 25 minutes, though, my pie was most definitely not done. Also, I really had no idea what texture I was going for. The pie was indeed "just brown," but parts were still jiggly and I was pretty sure that's not what my finished product was supposed to be like. So I left my pie in for somewhere on the order of 45 to 50 minutes. At that point it had a few brown spots, some cracks on the surface and a sort of "set" texture--like a mousse, almost. It didn't jiggle anymore but it also came off on my finger when I touched it. I can't vouch for whether or not this was how it was supposed to turn out, but I thought it worked.

My finished pie.

Note: as I've heard you should do with a meringue (though I've admittedly never made one), I turned off the oven and left my pie inside until it was completely cool. This gave it time to firm up a little more before I moved it into the fridge (it should be served chilled).

The next thing you want to prepare is the salsa for the bean cakes, since this takes a little bit of time. It's simple, though, just halve the tomatoes and the chile pepper, and roughly chop the onions. Place them on a baking sheet and drizzle with olive oil (I actually just use one of those olive oil sprays, since I can get better coverage that way). Place in a hot oven (mine was 500 degrees).

Before ....

I won't tell you how long to roast the vegetables because you really need to watch them. All ovens are a little different and you don't want to end up over-cooking them. Just pull them out when they develop a nice brown color.


After! That serrano at the bottom is a little over-done.

Now put the vegetables in a pot and add just enough water to cover them.  Boil for about 5 minutes, then put the vegetables (and the water) into a blender and puree until smooth. Then put the whole mix back into the pot and cook over a medium high heat until reduced down to a thick sauce-like consistency.

Reducing the salsa,.

You can whip up the cilantro yogurt now too, if you want. Just mix the three ingredients together and set aside.

I did the pork chops next. Here's how:

First combine the butter with the cumin, salt and pepper. Rub the pork chops all over with the mixture. Pork chops are slimy and so is butter, so you'll have to rub pretty vigorously to get the butter to stick to the chops.

Pork chops with butter. Wouldn't Paula Deen be proud!

Now put the pork chops on the grill and cook them over medium heat for about 7 and a half minutes per side.

Meanwhile, prepare the bacon and bananas.

Start by cooking the bacon in a frying pan for just a couple of minutes, long enough for some of the fat to render. Now I have to admit, I'm not sure of the reasoning behind this step--I'm thinking you could just use the bacon as-is without frying it first, since it will be cooked completely through in the next step.

Now cut the bananas into chunks sprinkle them with lemon juice. Wrap the bacon around each chunk. Skewer each wrapped piece through the overlap in the bacon, like so:

Bananas and bacon. Who woulda thunk.

After the chops have been cooking for about 15 minutes, turn the heat down to medium low and put the bacon and bananas on the grill. Use a meat thermometer to make sure the chops aren't cooking too fast. Continue to turn the chops and the bacon/banana skewers. At this point you can also start basting the chops with beer.

The steam is from the beer.

Now while all this is happening, you can work on your bean cakes. Personally, I think the author of this recipe was trying to play a joke on me, or else there are some cooking skills that I have yet to master. Or rather, that I am totally inept at.

So you need to start by rinsing the beans and then putting them in a food processor with the onion, cumin, jalapeno and about a tablespoon of water. Process until you have a nice paste.

Bean paste. At this point Martin walked in and said, "what the hell?"


OK, now is where everything went all downhill. The recipe says to make little cakes using about 2 tablespoons of bean mixture each. Then you're supposed to fry the cakes in the hot olive oil for about three minutes per side, or until the cakes are a "crispy brown."

Here's what happened to mine:

The cakes sucked up all the oil and then stuck to the bottom of the pan. When I tried to flip them, the "crispy brown" bit stayed put and all I got was a pile of mush on my spatula.

It all began with such good intentions ...

So after struggling with my unagreeable bean paste for way more than the recommended three minutes, I finally gave up and just mushed them all together and basically just made refried beans. After I took them out of the pan I put them on a plate and moved them into a warm oven so they dried out a little.


Uh ... yum?

Then guess what I did ... I got out the pastry cutter Martin uses to make scones, and I cut round cakes out of the slightly dried bean mash. Then I topped it with the salsa and yogurt. Suddenly it went from looking like something you may or may not feed your dog to something almost gourmet. Here it is on the plate with the pork chops, bacon and bananas:


Not so bad a food save if I say so myself.

So how was it? Well, when I put the plates on the table I would have bet someone's college savings (which is actually only about 50 bucks right now) that my kids were going to be unanimously grossed out. But I was surprised when Dylan ate everything on his plate--bananas and bacon included! He even liked the beans. Hailey tried everything and disliked most of it (which is Hailey's typical dinnertime routine), Natalie decided not to try any of it and Henry threw most of his on the floor. But the grown-ups both gave the meal a thumbs up. Bacon+banana: a surprisingly tasty combination. But for me the highlight of the meal was actually the beans! That was shocking, since the entire cooking process seemed so headed for disaster. But the little dollops of salsa and yogurt really made them taste good. I just wish I'd gotten the frying part right.

How about dessert? Well the papaya pie was definitely different from the pies my kids usually eat, but with the help of a little spray whipped cream, everyone enjoyed it. So as far as my family goes, the meal was not a disaster ... which is more than I can say for at least a few of these little multi-cultural experiments.

 A slice of papaya pie.


Next week: Argentina.

Thursday, November 10, 2011

Recipes from Antarctica

This week's recipes come from Antarctica. No, really. Antarctica.

I won't lie. I was really concerned about this one. I started doing research for it almost as soon as I decided to start writing this blog.

Here's why: There are no traditional Antarctic recipes. There is no "national dish of Antarctica." Recipes don't get passed down from generation to generation. That's because Antarctica has no native population, unless you count the penguins. No one really raises kids in Antarctica. In fact, until 1820 no human being had even laid eyes on the southern-most continent. And the only people who live there now are research scientists and the people who provide them with supportive services.


Just to set the record straight, Antarctica isn't a country. Unlike many of the other territories and psuedo-nations on my list, its status as a non-country isn't even in question. It has no government, though there are a few countries who have tried to lay claim to various regions. Activities in Antarctica are regulated by the 1959 Antarctic Treaty, which was signed by 12 nations (including neighbors Argentina, Chile and Australia, as well as the super-nations of the time, the USSR, the UK and of course the USA). The treaty primarily banned military activity and designated the continent as a scientific and environmental preserve.

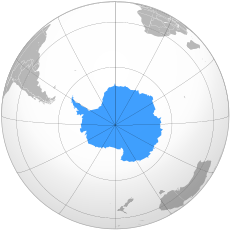
Antarctica, the bottom of the earth.


So I guess I could have opted out of Antarctica, since it clearly doesn't belong on a list of sovereign nations. But you know me.

So how does one go about finding recipes for a land of ice, that has no real culinary tradition and no permanent population?

Google, of course. At least that's where I started ... but I didn't get very far. Predictably, there were no easy-to-find Antarctica recipe collections or even single recipes anywhere on the internet. By week three of my search I'd almost resigned myself to cooking a meal of pemmican and sledging biscuits. My poor family.

I wasn't quite ready to quit yet, though, so I thought I'd try emailing some of the bloggers I'd found who had traveled to Antarctica or were just particularly enthusiastic about it. The first couple of people I contacted were happy to write back with suggestions, but when I asked them for a recipe that was "quintessentially Antarctic" they really just shrugged their electronic shoulders. I finally got put in touch with Jason Anthony, who is the author of a forthcoming book about food at the South Pole (Hoosh: Roast Penguin, Scurvy Day, and Other Stories of Antarctic Cuisine (At Table) , published by the University of Nebraska Press). Jason's book is "a narrative history of Antarctica with food as its focus," but even he had to admit that there really is no real "Antarctic cuisine." He did send me a link to a semi-famous cookie recipe by Antarctic dietician Sally Ayotte, but woman cannot feed family on cookies alone, though my kids would certainly not have a problem with the idea. 

Jason also offered to send me some recipes for penguin and seal. Now, I'm pretty sure, though I have never asked, that Safeway doesn't carry penguin or seal. I briefly considered substituting duck, but that felt too much like cheating. So I had to decline, and I was back to square one.

I was almost coming back around to the idea of pemmican and sledging biscuits (with cookies for dessert?) when I decided to try contacting someone who actually worked in a kitchen in Antarctica. So I emailed the Office of Legislative and Public Affairs at the National Science Foundation, which is in charge of the United States Antarctic Program, and they referred me to the contract agency that hires kitchen staff some of the research stations in Antarctica. That's when I first got in touch with Elaine Hood, who I have to thank for finally setting me on the right course.

Elaine got in touch with two Antarctica chefs--one former and one current--who both sent copies of the same recipe: Beef Wellington, which is served at the Amundsen-Scott South Pole Station every Christmas. Because it's the busy season in Antarctica, I wasn't able to coax any additional recipes out of them, but I did find a transcript of a sous chef at McMurdo Station cooking parsnip mashed potatoes, from which I gleaned ingredients (though I had to guess at measurements). And finally I went back to that Sally Ayotte cookie recipe for dessert. Yay! My Antarctica menu was complete.

"Cookie" Jon Emanuel, former chef at the
Amundsen-Scott South Pole Station.
James Brown, current chef at Amundsen-Scott South Pole. Both
these guys sent me a copy of the same Beef Wellington recipe.


Ready? Here are the recipes:

South Pole's Favorite Beef Wellington
Courtesy South Pole Chef James Brown and Former South Pole Chef Cookie Jon Emanuel

  • 1 whole beef tenderloin, trimmed of fat and silver skin 
  • 4 tbsp butter 
  • 1 lb mushrooms, sliced 
  • 2 garlic cloves, minced 
  • 1 C red wine 
  • 1 tsp fresh thyme leaves, chopped 
  • 2-3 sheets 12 x 6 frozen puff pastry dough (or equivalent) thawed 
  • 1 lb. pork liver paté (optional) 
  • 2 T prepared Dijon mustard 
  • 1 egg, beaten with 1 T water 
  • Salt and pepper to taste

Parsnip Mashed Potatoes
(from McMurdo Station, Antarctica)
  • 3 medium white potatoes
  • 3 parsnips
  • 1 medium onion
  • 5 cloves garlic
  • Salt to taste
  • 3 tbsp butter
  • 1/4 cup heavy cream
  • 1/4 tsp. white pepper

Sally Ayotte's South Pole Chocolate Chip Cookies
(recipe posted at Quark Expeditions)
  • 1/2 cup margarine
  • 1/2 cup butter
  • 3/4 cup packed brown sugar
  • 3/4 cup granulated sugar
  • 2 eggs
  • 2 teaspoons vanilla extract
  • 2 1/2 cups flour
  • 1 teaspoon baking soda
  • 1/2 teaspoon salt
  • 2/3 cup chocolate chips
  • 2/3 cup white chocolate chips
  • 2/3 cup butterscotch chips
  • 1 cup nuts, chopped  (I used peanuts and cashews)

First a word on the beef tenderloin. If you regularly shop for beef, you probably already know that this is the most expensive cut on the cow. If you get a whole tenderloin (as dictated by the recipe), you will probably spend more than 100 bucks (Sam's Club had whole tenderloins for $75). Unless you're feeding an army or a bunch of scientists at the South Pole, you won't need this much meat. But supermarkets usually cut tenderloins into fillets and sell them as "fillet mignon." If you want a piece of meat that will work in a Wellington, you'll need to ask your butcher to cut off a piece of a whole tenderloin. I asked for a pound and a half and was given more like a pound and three quarters. Here's what I spent:


Yes, that's right. Thirty bucks for a pound and 3/4 of beef.


I ended up cutting off two steaks and putting them away for later. The amount left over was just enough for Martin and I to enjoy and for my kids to reject (I didn't give them more than about a quarter slice each). So I'm guessing you could probably feed four adults on about 1 1/2 pounds of tenderloin.

A quick note on adjusting this recipe to feed fewer people: I used a lot less beef but I really only halved most of the other ingredients. So I probably ended up with a higher mushroom mixture to beef ratio than they'd see at the South Pole on Christmas day, but this worked just fine for me and made it easy to figure out what quantities to use.

So first trim all the fat and silver skin off the tenderloin, then rub it all over with salt and pepper.

Ready for the pan.


Now add about half of the butter and melt it over medium heat. Let it foam, then add the tenderloin and sear it on all sides until it is a nice brown color.

Sear the beef until all sides are brown (a little longer than pictured).


Remove the meat from the pan and let it cool. Now in the same skillet, add the rest of the butter and melt over high heat. Add the mushrooms and sauté until they reduce in size, but don't let them brown.

Saute the mushrooms in butter.


Just before the mushrooms are done, add the garlic. Pour in the wine and cook over a medium high heat until the liquid is reduced and the mixture is almost dry. Add the thyme, salt and pepper.

After the wine has reduced, add the thyme, salt and pepper.


Remove the mushrooms from the heat and let them cool in a shallow pan. Then put them in a food processor and chop them until they form a rough paste. Set aside.

Your chopped mushrooms should look a bit like this.


Lay the puff pastry out on the work surface. You may have to use some flour to prevent sticking (you may also have to roll the dough a bit until it is the right size). Now spread the mushroom mixture in a wide strip down the center of the pastry, leaving about an inch and a half of bare pastry at each end.

Spread the mushroom mixture in a wide strip down the center of the pastry.


Now if you were brave, you bought some paté. Personally, I think organs are yucky. But I like to be true to the recipe, so I got the paté. If you're not really used to buying such things, you can find pork liver paté in the canned meat section of most supermarkets. Here's what it looks like:

Ew.


Now the recipe says to "arrange thin slices of the paté down the center of the mushroom strip." My paté was a paste, and it didn't slice. So using my fingers (double ew), I just spread it down the center of the mushroom mixture. It was fiddly, but it worked.

The mushrooms with the paté. Ew and blech.


Brush the tenderloin all over with dijon mustard.

The tenderloin is ready to be wrapped in pastry.


As gently as you can, place the tenderloin in the middle of the mushroom and paté strip and wrap the pastry over it. Seal the edges with your fingers, then brush with the egg and water mixture to ensure a good seal. Repeat with the ends (trim any excess pastry, or it won't cook all the way through).


Seal the ends and brush with egg wash.


Now turn the wrapped meat over (carefully!) and place it in a greased pan so the seam is at the bottom. Brush the egg mixture over all the pastry, and then make three slits in the top to stop the pastry from bursting open while cooking.

An oven-ready beef Wellington. I still can't believe I got this right.


Bake at 400 degrees until the internal temperature reaches 120 degrees. Note: this temperature seems low, but once you take it out of the oven the meat will continue to cook and the temperature may climb by as much as 15 or 20 degrees. So if you want a rare or medium rare beef make sure to take it out early. Use a meat thermometer that can stay in the oven while cooking to ensure perfect results.

The pastry should be a golden color when you take it out of the oven. Let it rest for at least 15 minutes before slicing. When you do cut into it, the juices should flow out and you can use this to make an au jus sauce to serve with it.

Yum yum yum yum yum yum yum


While your Wellington is in the oven, you can start on the parsnip mashed potatoes. This isn't usually what they serve with the beef Wellington on Christmas at the South Pole, but they do serve it at various other times of the year. So it's not the full Christmas-at-the-Pole experience (you would actually also need lobster tail for that) but it's still true to the region.

First assemble your ingredients:

A simple recipe: parsnips, potatoes, onions and garlic.


Now peel the potatoes and parsnips and boil them with the garlic until all the vegetables are soft. Meanwhile, saute the onions until they are translucent but not brown (you want the final dish to have a creamy white color).

Saute the onions. I should really have a stock photo of this.


When the vegetables and onions are done, mash them all together and add the cream, butter, salt and white pepper. 


Now put it all together:

This meal is from Antarctica! Wow!


But ... we can't forget the cookies! I am told that these cookies are so famous, the Air National Guard has been known to detour to the South Pole just to get some.

I made them earlier in the day with Hailey's help. For a famous recipe there's actually not much to it (at least nothing that different from making any batch of cookies).

First, cream the butter, margarine and the two kinds of sugar. Confession: when I made these I read the recipe wrong, and only used a half cup of butter (without the margarine). Mine were still really good, but the extra half cup of butter will give you a softer cookie.

My mixture was more of a crumble than a "cream," because I left out the margarine.


Now add the eggs and the vanilla:

This made the mixture a lot creamier.


In a separate bowl, mix together the flour, baking soda and salt. Then add to the sugar/butter/egg mixture and blend until a soft dough forms. Then dump in the chips.

Dang, that is a whole lotta chips.


Finally, add the chopped nuts. I made a batch with nuts and a batch without (I'm not quite ready to test Henry for peanut allergies).

Now drop the dough by teaspoons onto a baking sheet, about two inches apart. The recipe doesn't say to grease the baking sheet, but my cookies stuck pretty badly so I would definitely put a little butter on the pan next time I make these.

Ready for the oven.


Bake at 375 degrees for 12 to 14 minutes, or until the bottom edges are lightly browned. Now try telling your family they can't have any until after dinner.

We want cookies NOW!!!!


So how did this meal go over? Well predictably, my kids were more interested in the pastry than in the meat, but that's just them. As far as I'm concerned, the whole meal was delicious. The beef was juicy and perfect (and I couldn't even taste the paté!) The potatoes were good too, with just a little hint of parsnip flavor (next time I might use a few more parsnips). I did undercook the onions which was kind of unfortunate, but they were still good.

Now Martin didn't like having onions in his mashed potatoes. I guess it wasn't British enough for him. Also I think he was a little perturbed because I invaded his territory (Martin usually makes the beef Wellingtons in our house). But he admitted that the meal was good, though he would not admit that it was better than the ones he usually does. I won't say what I thought.

As for the cookies, well, they were awesome too. I guess I don't have to tell you that my kids agreed.

The finished cookies. The recipe makes between 3 and 4 dozen.


Next week: Antigua and Barbuda.


Copyright 2023 Becki Robins and Palfrey Media.. Powered by Blogger.

Blog Flux

Blog Directory