Recipes from Marche, Italy

For this entry, I made two recipes. Neither of them were especially good, but I don't blame the people who posted the original recipes or any of the traditions they came from, I blame myself and my propensity for Googling things that might kill me.

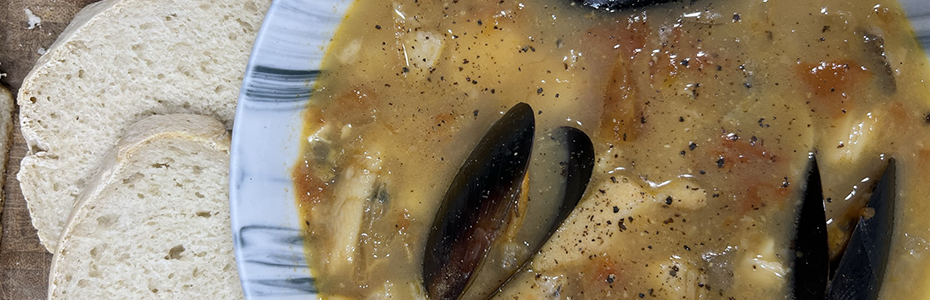
Recipes from Marche, Italy: Brodetto

A seafood stew with mussels and clams, minus the Vibrio.

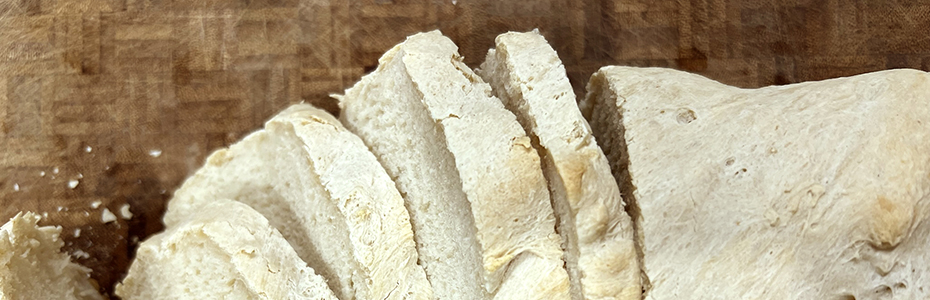
Recipes from Marche, Italy: Filone Casereccio

An Italian bread that will come out much better than mine did if you use fresh brewer's yeast and steam.

Recipes from Malta

This is actually the third time I’ve cooked a meal from Malta. The first time, I cooked the meal and then just did not write the blog post. Years went by.

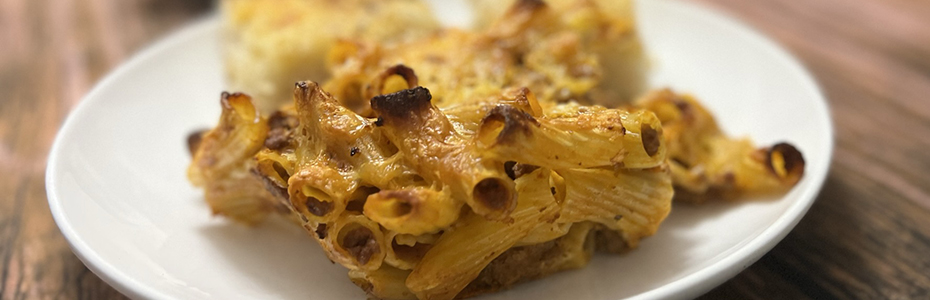
Recipes from Malta: Imqarrun

Imquarrum (also called Imqarrun il-forn) is descended from a dish served in Sicily, but the Maltese have adopted it as a traditional staple. The key to making this dish is to be patient.

Tuesday, January 10, 2012

Sachertorte

My darling husband has expressly forbidden me to post the Austrian dessert recipe I promised you last week. Something about the integrity of my blog being compromised if I post a recipe I haven't actually made, blah blah blah. Seriously though, those were the exact words he used, "I forbid you." To which my reply is, of course, "Wilst thou cut off mine hand shouldst I disobey thee?" Anyway since I'm not actually a medieval wife, I'm going to post the recipe anyway, though I will promise poor dear Martin that I'll make it and report back here in the next couple of weeks, since really his only reason for "forbidding" the posting of the recipe had nothing to do with the integrity of my blog and everything to do with the fact that he wanted to eat sachertorte.

So first I want to thank Ted Field, who has a great blog called "A Year of Wine" and has graciously allowed me to use his photo for this entry, since I haven't (yet) made a sachertorte and have no photo of my own. I admit I only stumbled on his blog because I was searching for said sachertorte photo, but I'm putting it on my Google reader because a girl can always use help pairing food and wine, since all I personally really know is that red wine goes with beef and white wine goes with fish. At least I think it does.

This is Ted's photo:

Photo courtesy Ted Field, "A Year of Wine"

Now after seeing that, can you really blame Martin for wanting me to make a sachertorte? Though you know, I still think his choice of words was a little unfortunate.

Here is the recipe (from Epicurious):

For the Cake:
  • 6 eggs, separated
  • 5 oz bittersweet chocolate, finely chopped
  • 9 tbsp butter
  • 1 tsp vanilla extract
  • 1 cup powdered sugar
  • 1/2 cup granulated sugar
  • 1 cup all-purpose flour
  • 1 cup apricot preserves
For the Glaze:
  • 4 oz bittersweet chocolate
  • 2 tbsp butter
  • 1/2 cup whipping cream
  • 2 tsp light corn syrup

(Note: this recipe came from Epicurious.com, and originally appeared in a book called "Kaffeehaus: The Best Desserts from the Classic Cafés of Vienna, Budapest, and Prague." Except for the chocolate glaze recipe, also borrowed from Ted's blog, because it just sounded better than the one they had on Epicurious.)

Start by preheating the oven to 400 degrees. Lightly butter a 9-inch springform pan.

Melt the chocolate over medium heat, stirring frequently. Let cool slightly.

With an electric mixer, beat the butter until smooth, then add the powdered sugar and continue to beat until fluffy. Add the egg yolks one at a time, then the melted chocolate and vanilla.

Beat the egg whites with the granulated sugar until they form soft peaks, but don't overdo it. Add about 25% of the egg white mixture to the chocolate mixture (just enough to lighten the color and texture), then fold in the rest. Sift one half of the flour over the batter and fold in gently. Repeat.

Spread the batter into the pan and bake about 45 minutes, or until a toothpick comes out clean. Cool for about 10 minutes, then remove the cake from the pan and allow it to cool completely.

Cut the cake into two equal layers (carefully!) Heat the apricot preserves over a low heat until melted. Top of one of the cake layers with a generous amount of preserves, then add the second layer and top with the rest of the preserves. Let cool.

Now melt the chocolate and the butter over low heat, until just melted. In a separate saucepan, combine the whipping cream and corn syrup and bring to a gentle boil. Reduce heat and simmer for about 2 minutes, then stir in the melted chocolate and butter. Cool slightly, so that the glaze is no longer hot but can still be poured.

Pour the glaze over the cake and smooth it with a spatula on the top and sides. Let stand at room temperature for 1 hour before serving.

Can you see why I haven't made this yet? I'm exhausted just from typing all of that.

Friday, January 6, 2012

Recipes from Austria


Recipes from Austria
Last week I got a bit of a poor start, so this week I'm going to dive right in, with just a quick note to let you know that Henry is happily recovered and eating everything in the house, including all of that cocktail bread from last week's post, which frankly I can't understand because I have since decided that I personally really dislike pumpernickel bread.

So we're still in Austria this week, and if you don't already know a little about this small European country I'll just give a few details.

I was actually surprised to discover that Austria is one of the wealthiest nations in the world, with a per-capita GDP of around $48,000. This puts it in the same club as Switzerland, the United States and Brunei, as far as personal income for its citizens is concerned. Austria is landlocked and located in the Alps, so it is very mountainous with its highest peak at 12,461 feet elevation and only 32% of its land area below 1,640 feet. It is bordered by eight other nations, including Germany, Switzerland, Hungary and Italy, many of which have had an influence on its cuisine.

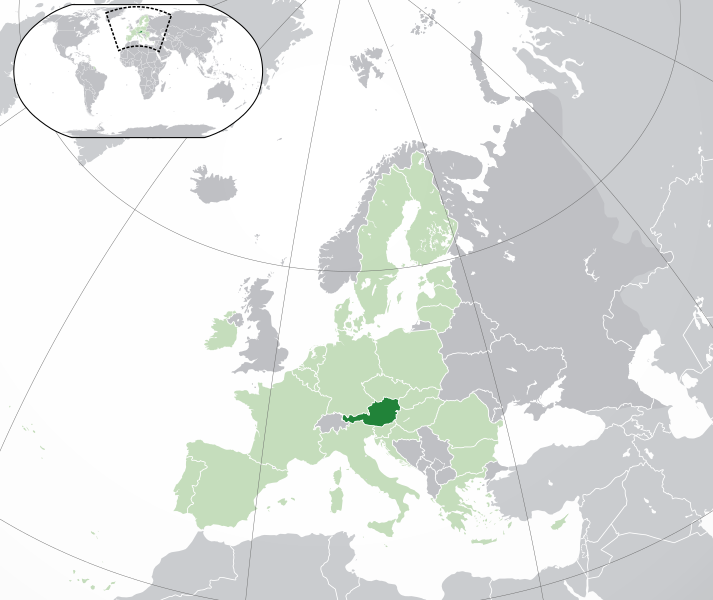
There's Austria, somewhere in the middle of Europe.


Food cooked in Austria is fine-dining almost by default; this is because of Austria's very strict food quality control laws. It is considered the number one European producer of organic foods and the government has taken many steps to limit or prohibit biotechnology, growth-hormones and other production-enhancing techniques that are standard practice here in the United States. The result is very high quality food products and a reputation for fine cuisine.


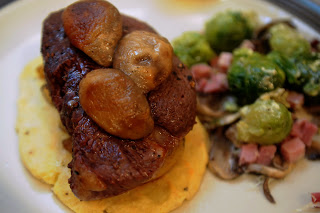
Filet mit Äpfeln and Gebackene Kohlsprossen. See if you can say that 10 times fast.

So with that in mind, I picked a fine-dining favorite as my Austrian main course: Filet mit Äpfeln (from Austrian Recipes.net), which is a broiled beef tenderloin served on sautéed apples. Here are the ingredients:

  • 6 6-ounce slices filet of beef
  • 1 pound potatoes
  • 2 egg yolks, well beaten
  • 2 tbsp ground horseradish
  • salt and pepper to taste
  • 2 tbsp butter
  • 6 mushrooms, peeled
  • 2 Granny Smith apples, peeled, cored and sliced

On the side I did Gebackene Kohlsprossen (from Austrian Recipes.net), which is a baked dish made with Brussels sprouts, ham and mushrooms (note: if I did this over again I might have made a different side dish, since there were already mushrooms in the steak recipe).


For the sprouts:
  • 1 pound Brussels sprouts
  • 1 cup lean cooked ham
  • 1/2 pound mushrooms


For the sauce:
  • 2 egg yolks
  • 3/4 cup heavy cream
  • 1/4 cup + 2 tbsp grated Parmesan, divided

I skipped dessert this time, mostly because the one I wanted to do required more time than I actually had that day. But I may post it separately anyway, because it looks seriously yummy.

I did do an appetizer, which was interesting. Notice how I did not say it was good, I said it was "interesting."

Remember the pumpernickel recipe from last week? Well I started with that (here it is again) (from Traditional Food):
  • 2 tbsp + 3/4 tsp active dry yeast
  • 1 3/4 cup warm water (105 to 115 degrees F)
  • 1/2 cup dark molasses
  • 2 tablespoons vegetable oil
  • 1 tablespoon caraway seed
  • 1 tablespoon salt
  • 2 1/2 cups dark rye flour
  • 1 cup Shredded Wheat cereal
  • 1/4 cup cocoa
  • 2 to 2 1/2 cups all-purpose flour
  • Cornmeal
  • Butter or margarine, softened

And with the bread I did a popular cheese dish called Liptauer Käse (from Austrian Recipes.net):

  • 8 ounces smooth farmer's cheese, room temperature
  • 3 tbsp finely chopped onion
  • 1 tbsp anchovy paste or finely chopped anchovies
  • 1 tbsp finely chopped capers
  • 1/2 tsp caraway seeds
  • 1/2 tsp sweet paprika

Which brings me to my first challenge of the week, which was the farmer's cheese.

Now, farmer's cheese doesn't necessarily mean the same thing to all people, and I'm still not sure I got it right. In these parts, you can't just go into a store and buy something called "farmer's cheese," oh no, because nothing is ever that easy. For me.

"Farmer's cheese" in its broadest interpretation is just an unripened cheese. Queso Fresco, which is that white crumbly stuff you often see on beans in Mexican restaurants, is sometimes called a farmer's cheese. So is cream cheese, and so is Ricotta. But these three cheeses would have made three completely different dishes, and I really had no idea which one would have been closest to the real thing, so I chose not to use any of them.

Instead I looked around locally for a cheese labeled "farmer's cheese," without any success. I did find some Halloumi at the co-op, though, which was annoying (do you remember what I had to do to get Halloumi back in Akrotiri?) After failing to find any farmer's cheese at any of three local markets, I decided to make some instead. Strictly speaking, "farmer's cheese" (the kind that is not Queso Fresco, cream cheese or ricotta) is compressed cottage cheese, and the technique for making it is really simple. Here are the ingredients:


  • 16 ounces 4% milk fat small curd cottage cheese
  • Cheesecloth

To make farmer's cheese, scoop the cottage cheese out of the pot and wrap it up in the cheesecloth. Squeeze it with your hands until the liquid comes out of it. Keep squeezing.


See all that liquid? Ew.

Now put the cheesecloth-wrapped cheese in a colander inside a bowl, and put the bowl in the fridge. Leave it for a day or two until all the liquid has drained out.


Let it drain in the fridge.

Remove the dry curds from the cheesecloth and put them in a food processor. Blend until smooth. You're done! (once the liquid has been squeezed out, you'll end up with about nine ounces of cheese).

Fresh farmer's cheese, after processing in a blender.


The next step of course is turning the farmer's cheese into Liptauer Käse, which is also pretty easy. Here are the instructions:

Mix everything together. Serve.

Just mix it all together ...


... and you're done!

 The Austrians like to eat Liptauer Käse on rye bread or on pumpernickel, which is where that recipe from last week comes in. I did decide to make it after all, mainly because Henry kept sneaking into the kitchen and eating all the cocktail pumpernickel behind my back.

So I did what I always do with bread recipes, and for the second week in a row I ended up with flat loaves, which means I may be rethinking my approach to converting bread recipes for the bread machine.

I always proof the yeast in warm water first, but my bread machine's dough cycle has a 30 minute delay at the beginning, which I'm now thinking is probably the equivalent of proofing the yeast. Maybe I'm over-proofing? If anyone has a guess, I'd love to hear it.

Anyway this part of the entry is a description of my failed bread-machine interpretation, so if you want the traditional instructions, please see last week's entry.

So after I proofed the yeast I put it and all the ingredients except the all-purpose flour into my bread machine and set the machine on the dough cycle. I let the machine mix for about 10 minutes, then I added all-purpose flour until the dough looked right. I did need the full 2 1/2 cups.

When the machine was finished and the dough had done its first rise, I turned it out onto a floured surface and divided it in two. Even with the 2 1/2 cups of all-purpose flour this was a really sticky dough, which may have been another part of my problem.

This dough seemed waaaay too sticky.


Undeterred though, I added a little cornmeal to a buttered cookie sheet and put the two dough halves on each end. I brushed some melted butter on the tops and let them rise for another 45 minutes.

Just about ready for the oven.


The final step of course is to bake at 375 degrees for 30 to 35 minutes, until you hear that hollow sound when you hit it with your knuckles. Or as in my case, a dull thump, because nothing that flat can make a hollow sound.

I could not taste the cheese over the strongly-flavored bread.


Now on to the steaks. Fortunately, steaks are hard to screw up.

Start by taking the steaks out of the fridge and rubbing salt and pepper into both sides. Keep them at room temperature for about an hour.

A little salt and pepper is all these need.


Filet mit Äpfeln is served on a potato cake, so the next step is to peel the potatoes and boil them in salted water for about 12 minutes. When they are soft, take them out and put them through a potato ricer. If you don't have a ricer you can use a potato masher, but you do need to make sure there aren't any lumps.

Riced potatoes.


Now mix the potatoes with the egg yolks, horseradish, and a little salt and pepper. Shape them into cakes that are roughly the same size as your steaks. Place them on a greased cookie sheet and bake them in a 375 degree oven for about 10 minutes, or until the tops turn a nice golden color. Flip them over and repeat with the other side. Remove from the oven and keep warm.

Two steak-sized potato cakes.


Light your broiler and cook the steaks, turning once, until they reach an internal temperature of about 135 degrees (remember that the temperature will continue to rise by about 10 to 12 degrees after you take them out of the oven, which will give you a medium-rare steak).

While your steaks are cooking, slice the apples and saute them with the mushrooms in melted butter.

Sauteing the mushrooms and apples.


When the meat has rested for about 10 minutes, assemble the dish. Start by placing a potato cake on the plate, then cover with sliced apple.


The first two layers ...

Put the steak on top and top with the mushrooms.

... and the next two.


The Gebackene Kohlsprossen can be prepared in advance, and then popped in the oven about 15 minutes before serving (I put them in the oven at the same time as the potato cakes, and then stuck them on the bottom rack for the last few minutes while the steaks were broiling to keep them warm).


Start by boiling the sprouts in salted water for 20 minutes or so, until they are tender.

Here's a quick note for all you Brussels sprouts haters, which is based purely on my anecdotal experience and some wisdom passed down by Martin's dad, who always used to say that Brussels sprouts shouldn't be picked until the crop has been through a good frost. He claimed that the frost took away some of the bitterness which is what puts a lot of people off of Brussels sprouts. Of course, here in California sprouts almost never get a frost, so fresh ones just aren't very nice. Personally, I will always buy frozen sprouts because I think freezing them does the same thing for them as a frost does. Though like I said, this is pure anecdote. I haven't even checked to see if anyone in the culinary world agrees with me.

In my defense, Brussels sprouts are really the only vegetable I will buy frozen.

Anyway, boil your sprouts, then drain them and put them in the bottom of a casserole dish. If you have enough of them, just put in half.

First put down the boiled sprouts.


Next, lay down the diced ham, or half of it if you're making a big batch.

Add the ham ...


Now the mushrooms, and so on, until you've used up all of your ingredients.

... then the mushrooms.


In a small bowl, beat together the egg, cream and 1/4 cup of the Parmesan cheese. Pour the mixture over the casserole and sprinkle with the remaining two tablespoons of grated cheese. Bake in a 400 degree oven for 10 to 15 minutes.

This dish is ready for the oven.


Martin and I had this meal after the kids went to bed. It's really just too hard for me to waste beef tenderloin on picky eaters.

You can't really go wrong with a filet, unless of course you overcook it, so the main meal was a nice treat. The potato cake had just enough horseradish in it to compliment the beef without being overwhelming, and the apples and mushrooms were a nice addition. I guess my only complaint was that I couldn't really figure out how to eat it all. I have no problem with recipes that incorporate many different flavors, but if you can't combine all the flavors in a single bite the dish just seems a little disjointed. In this case, it was impossible to get potato, meat, apple and mushroom on the fork at the same time, so I had to eat most of the layers separately. Martin's main complaint was that it just didn't seem different enough, which does seem to be his most-used Travel by Stove complaint. He's not really happy unless there's kangaroo in it I guess.

We both liked the Brussels sprouts, which were creamy and cheesy and worked really well with the mushrooms and ham. Since I was serving this with another meat, it might have been a good idea to cut back a bit on the ham.

What about the pumpernickel and the Liptauer Käse? Well, even if my bread hadn't come out flat, I don't think I would have liked it. Pumpernickel is just a little too bitter for me, and its flavor really overwhelmed the Liptauer Käse, to the point where I almost couldn't tell I'd even put anything on the bread.

The good news is, that extra loaf made an awesome frisbee.

Next week: Azerbaijan.


DPG8YN7NQTAF

Thursday, December 29, 2011

Austrian Pumpernickel Bread


My poor baby boy has been sick since last Thursday, and he spent last night in the hospital with dehydration and low blood sugar. So it's been a really rough week for us (though we did manage to pull off a pretty decent Christmas).

So I'm putting off my adventure to Austria, though hopefully only for another couple of days (it's obviously going to depend on when Henry gets home and starts feeling like himself). But I did want to post a recipe today anyway, just to get the proverbial ball rolling.

First a disclaimer: I wasn't actually going to make this recipe, nor have I ever made this recipe, though now that I've looked at it I might try it once things settle down. This week I was planning to keep things pretty low key, so I actually just cheated and bought a loaf of cocktail pumpernickel to serve with the appetizer I plan to make. But in case you don't want to cheat, here is a genuine Austrian pumpernickel recipe:

Dark Pumpernickel Bread
(from Traditional Food)
  • 3 packages active dry yeast
  • 3/4 cup warm water (105 to 115 degrees F)
  • 1/2 cup dark molasses
  • 2 tablespoons vegetable oil
  • 1 tablespoon caraway seed
  • 1 tablespoon salt
  • 2 1/2 cups dark rye flour
  • 1 cup Shredded Wheat cereal
  • 1/4 cup cocoa
  • 2 to 2 1/2 cups all-purpose flour
  • Cornmeal
  • Butter or margarine, softened

Now if you read this blog you already know that I always try to make a bread machine recipe out of pretty much every yeast bread recipe I come across. So if it was me, I would prove the yeast and then I would just dump all the ingredients into my bread machine and let the machine do the work (though I don't ever actually bake bread in the machine, I usually take it out and bake it in the oven).

So to make this bread, first dissolve the yeast in the warm water and let it sit until it is frothy. Then add the molasses, vegetable oil, caraway seed, salt, rye flour, shredded wheat and cocoa.

Mix until smooth, then add the all-purpose flour until a smooth dough forms. Turn it out onto a floured surface and cover. Let it rest for 10 or 15 minutes.

Now on to the kneading, which is something I never do so I can't really speak here with any authority. The recipe tells you to "knead until smooth," which evidently should only take about 5 minutes.

Now place the dough in a greased bowl and cover. Let it rise in a warm place until the dough has about doubled in size, which usually takes about an hour.

Sprinkle a greased cookie sheet with cornmeal. Punch down the dough and divide in two, shaping each half into a round loaf. Put loaves onto opposite corners of the cookie sheet so they don't bake into each other. Brush the top of each loaf with some melted butter, then let them rise again until they've about doubled, another hour or so.

Bake the bread in a preheated 375 degree oven for about 30 to 35 minutes, or until the loaves sound hollow when you rap them with your knuckles.

Viola! Austrian pumpernickel.

And because you can't do a blog post without a photo, here is a picture of the very much not Austrian pumpernickel I got at the grocery store. I promise if I ever make this recipe I will replace it with a genuine photo.

This is not Austrian pumpernickel. This is the cocktail pumpernickel I bought at Safeway.

Please wish Henry some good health; hopefully in a few days I'll be able to post the complete meal. Happy New Year everyone, in case I don't post before then.

Thursday, December 22, 2011

Recipes from Australia

This week we're traveling to the land of huge spiders and deadly snakes. Thank god we're only going there figuratively. Don't get me wrong, I would actually like to visit Australia one day, but I think I'll wear a hazmat suit when I do.

Australia is probably not a huge mystery to anyone reading this blog, but I'll give you a little background anyway. It is the world's sixth largest country by land area, the world's 13th largest economy and it ranks second on the global human development index, which means that Australian citizens enjoy an advanced healthcare system, a good education system and a very good overall quality of life. Except for the spiders and deadly snakes of course. Here is Australia on a map, although unless you flunked geography I'd be really surprised if you didn't already know where it was:


Because Australia was settled primarily by the British, mainstream Australian food is heavily influenced by British cuisine, though there has been something of a revived interest in "bush tucker," that is, foods that are native to Australia (many of which were used as traditional food sources by indigenous Australian people).

Sadly, though, bush tucker isn't really available worldwide, even on gourmet websites, so I quickly ruled this out as something I could do practically for my Australian meal. I did, however, have a card to play that I haven't had in any prior weeks: I was able to ask, you know, an actual Australian. I figured my friend Heath, who was born and raised there, could probably at least point me in the right direction.

Heath came back with a dessert recommendation pretty quickly, but when I asked him if he had any main course ideas, he reconfirmed what I'd already read: that most of what Australians eat could pass for European or American food, with the exception of maybe one meat: kangaroo.

Kangaroo burgers with tomato chutney and chips.


Now I admit, as soon as he said this my first reaction was, "Yeah right, like I could find kangaroo in Grass Valley, CA." But then I got to thinking about it and wondered if I could maybe track some down in Sacramento, which is about an hour and a half drive. I'm down there a couple of times a month anyway, so it wouldn't be that big a deal to sidetrack a bit to pick up something that would really make this meal experience an authentic one. So I did a quick search on the internet and within about five minutes came up with a source that claimed they could special-order kangaroo, among other things (like alligator, caribou, wild boar and rattlesnake). So I called them, and they had it in their store in less than five days. Just in case you're in the greater Sacramento area and would like to order some kangaroo (or alligator, caribou, wild boar etc.), the store is called "Corti Brothers," and you can call them at (916) 736-3800.

Now, before you say, "Oh my God, kangaroos are so cute, how could you eat one??" Please keep in mind the following two facts:

1. Kangaroos are assholes. If you don't believe me, watch this video.

2. Kangaroo is an environmentally friendly meat. Kangaroos are killed by hunters under a government quota system, which means that wild kangaroo meat has very little environmental impact apart from what kangaroos naturally do to their environment. Even farmed kangaroo meat is more environmentally friendly than traditional meats such as beef, since kangaroos need less feed, don't destroy the root systems of pasture grasses and are adapted to dry and drought conditions.

So with all of my justifications in place, I decided on this recipe: 

Kangaroo Burgers 
(from KangarooMeat.net)
  • 1 lb miced kangaroo meat
  • 1 onion, finely chopped
  • 1 garlic clove, minced
  • 1 tbsp cilantro, chopped
  • 1 tbsp vegetable oil
  • 4 large lettuce leaves (I used butter lettuce)
  • 4 burger buns (recipe follows)

Now kangaroo, I was warned, is a very strong flavored meat, so it needs to be paired with other strong flavors so it doesn't become overwhelming. Instead of ketchup, I decided to use an Australian condiment called "bush tomato chutney." Here is the recipe:

"Bush" Tomato Chutney
(from ABC.net.au)
  • 3 tomatoes
  • 1 cup sugar
  • 1/4 cup dried bush tomatoes, chopped (or substitute sundried tomatoes)
  • 1 red onion, chopped
  • 1 clove garlic
  • 1/2 a granny smith apple
  • 2 tbsp golden raisins
  • White vinegar (enough to cover)
  • 1/2 tsp salt
  • 1/2 tsp chili powder

I also baked my own hamburger buns. I found a few Australian burger recipes that called for brioche buns, so I tracked down this recipe (posted by an Australian blogger):

Light Brioche Burger Buns
(from Smitten Kitchen)
  •  3 tbsp warm milk
  • 2 tsp active dry yeast
  • 2 1/2 tbsp sugar
  • 2 large eggs
  • 3 cups bread flour
  • 1/3 cup all-purpose flour
  • 1 1/2 tsp salt
  • 2 1/2 tbsp unsalted butter, softened
  • Sesame seeds (optional)

And of course, what burger is complete without chips? Here's an Australian chip recipe, which is really no different from any American French fry recipe I've ever seen:

Aussie Chips
(from Altius Directory)
  • 6 medium sized red potatoes (the Australian recipe called for Désirée potatoes)
  • 3 cups vegetable oil
  • Sea salt to taste

And finally, the dessert recipe Heath suggested:

Pavlova
(from Aussie Info)
  • 4 large egg whites
  • pinch of salt
  • 8 oz baking sugar (super fine, but not powdered)
  • 1 tsp white vinegar
  • 1 tsp vanilla essence, divided
  • 2 tsp cornstarch
  • 3/4 cup heavy cream
  • 2 tbsp baking sugar
  • 1 lb strawberries, quartered

That's a lot more recipes than I usually do, but hey, how often does a person get to eat kangaroo? I wanted to do it justice.

So the very first thing I did (the day before meal day) was make the tomato chutney. I love making chutney (I've made mango chutney a few times) and this was my first attempt at doing one with tomatoes, which are technically fruits but don't really make a particularly fruity chutney.

Now I am pretty sure that kangaroo counts as "bush tucker," but one thing I didn't actually notice when I imported this tomato chutney recipe into my recipe book was the presence of another bush tucker ingredient, "bush tomatoes," which though closely related to the tomato are actually a kind of wild berry that grows in the arid parts of Australia. By the time I noticed this ingredient in the recipe, though, I'd already started making it. Yes I know, "bush tomato chutney," bush tomatoes, duh. I just thought it was an Aussie name for an Aussie recipe. In my defense, I would have had a pretty hard time finding bush tomatoes even if I'd known about this in advance, because as I said earlier, even online gourmet shops haven't yet come around to the idea of bush tucker.

Fortunately, I quickly found a source that suggested substituting sun dried tomatoes, which have a similar flavor, so I called that good enough since I had some sun dried tomatoes on hand. Of course, mine had a long gone best-by date which I won't even repeat here, but I figured some heat ought to bring them back to life. I hoped.

Sundried tomatoes. No, they are not supposed to be that color.


So other than the presence of this impossible-to-locate ingredient, this recipe is actually blissfully simple. First cut up the tomatoes, garlic and onions and put them in a medium sized saucepan. Add just enough vinegar to cover them.

Cover the tomatoes, onion and garlic with white vinegar.


Now add the rest of the ingredients and bring to a boil. Reduce heat and simmer until the vegetables are soft and the entire mixture has a jam-like consistency.

Here's the chutney after about an hour on the stove.


This recipe makes about a jar of chutney, which is way more than you would need for the burgers. I put mine in a sterilized Ball jar, but I don't know anything about canning so I plan to use it up in about a week. Unless you know what you're doing, please don't try canning this recipe for the long haul (botulism, need I say more?)

The next thing I did was make the brioche buns. This recipe was a little weird because it made a super-sticky dough that was really difficult to work with. Part of this, of course, was because I missed the part that said I was only supposed to put one of the eggs in the dough. (I later discovered that the other egg was just supposed to be used to brown the buns while in the oven).

So this is not a bread machine recipe, but I made it in my bread machine because there's no way I'm ever going to be caught kneading dough. If you want the old-fashioned instructions I'm going to point you to the original recipe, because they are pretty long and this post is already longer than usual.

Before getting my bread machine involved I do prove the yeast like so:

In a glass bowl, combine the water, milk, yeast and sugar. Let it stand until frothy.

Frothy yeast is ready to be added to the bread machine.


Mix together the dry ingredients and put them in your bread machine, then add the milk/yeast mixture. Now beat one of the eggs (just one!) and add that. Set your machine to the dough setting and let it do all the hard stuff for you. Note: don't forget to put the paddle in the machine. I know, who would be stupid enough to do that? (whistling and looking around innocently)

Here is the dough after rising.


After the dough has risen in your machine turn it out onto a well-floured surface, (and I do mean well-floured). Divide it up into eight equal sized balls. This will be difficult because even with just one egg this dough is really sticky. I mainly just approximated balls, trying to make a few that were the right size for my kids. After rising I ended up with two enormous buns and a whole bunch of regular-sized ones, so I very much overestimated the size of the balls.


This is about as close as I could come to making balls.


Put the dough balls on baking sheets lined with wax paper and let them rise for another hour or so. When they're big enough, mix the second egg with a little bit of water and brush the tops of the buns, then sprinkle with sesame seeds.

After rising, the buns are painted with an egg wash.


Bake for 15 to 20 minutes at 400 degrees, turning the pan once to make sure they bake evenly.

Mine came out huge but flat, which might have had something to do with that extra egg. They still tasted good and made great burger buns.

Finished brioche buns. Mine were a little flat.


So I did both the chutney and the buns a day in advance. The next day at around lunchtime I started on the pavlova.

Just a quick note on pavlova, though served all over Australia there is evidently some controversy about which country actually owns this dessert. The main contender against Australia is, of course, New Zealand. Because you know, Australians and New Zealanders always have to fight about something. The only thing that can really be agreed about is that pavlova was invented in honor of the ballet dancer Anna Pavlova.

Pavlova is basically a meringue filled with whipped cream and topped with fruit (strawberries are popular). If you've never made a meringue, don't worry, it's not as scary as it sounds.

Start by beating the egg whites with the salt until they form stiff peaks. Then gradually add the sugar, vinegar and half a teaspoon of the vanilla. If your meringue comes out like mine did, it should be thick and creamy with a lot of volume, but not necessarily fluffy. Since I've never made a true meringue like this one, I don't know if this is really how it is supposed to look, but based on my results I'd guess I probably came close.

This is my meringue after adding the sugar, vanilla and vinegar.


Now spread the mixture into a lightly-greased pie plate, leaving a hollow in the center for the filling (which you will add after baking). I interpreted this to mean I should make a ring out of the meringue with an actual hole in the center, and it wasn't until I'd baked the danged thing that it dawned on me that "hollow" probably meant and indentation in the center (as opposed to a hole). This would obviously make for easier slicing.

Spread it into the pan, but don't leave a hole (just a hollow).


Baking times differ for this recipe depending on the kind of oven you have. The important thing to remember is that you have to start off with a 400 degree oven whether you have gas or electric. If your stove is electric, you preheat to 400, put the meringue in the oven and immediately reduce the temperature to 250 degrees. Bake for 1 1/2 hours, making sure not to disturb the pan.

If you have a gas oven like mine, put the meringue in and bake at 400 degrees for 10 minutes, then reduce the heat to 250 and bake for another hour.

Turn the oven off, but don't take the meringue out until it is cool. Leave it alone.

The meringue should be crispy and light brown in color.


Just before you are ready to serve, whip the cream until stiff peaks form, then add the sugar and vanilla extract. Spread the whipped cream into the hollow at the center of the meringue, then top with strawberries (or use whatever fruit is in season. Strawberries are most definitely not in season around here, and the ones I had were kind of blah).

Here's the finished pavlova. Mine had cracks (oh well).


OK, now for the main event: the kangaroo.

Just in case you thought I wasn't serious ...


The first thing I noticed about kangaroo is the color (a very deep red) and the total absence of fat. I don't think I've ever seen a piece of red meat that lean. The second thing I noticed was the blood. This was by far the bloodiest piece of meat I've ever worked with.

Kangaroo is a really dark read meat with almost no fat.


Because the meat came as a steak, I had to grind it myself. I don't own a meat grinder but I figured my little mini food processor would do the trick, and it did. But I ended up with some really wet ground meat, presumably because of all that blood.

After grinding, the meat looks a little pinker.


Kangaroo, as I said, is a very flavorful meat so it needs to be prepared with other flavorful things. This recipe called for finely chopped onion, garlic and cilantro, which basically just needs to be mixed into the meat with a little salt and pepper.

Mix the meat with onions, garlic and cilantro.


Now if your kangaroo meat is as bloody as mine was, you'll end up with a really wet patty that won't really cook well on a BBQ, because it will ooze between the grill wires instead of sitting on top of them, then it will fall apart when you try to flip it. Trust me because this is what I tried to do, even though I suspected I wasn't going to have great results. I guess this might be why most of the kangaroo burger recipes I've seen call for cooking on a grill pan instead of on an outdoor grill. Anyway, I did get a little charcoal flavor into mine before I had to rescue them (in bits and pieces) and take them inside to finish cooking in a pan. Fortunately they were burgers, so they could be reassembled and then hidden in a burger bun, and none's the wiser.

Mine fell apart on the grill, so I finished them in a pan.


Note: don't cook your kangaroo (or any other game meat for that matter) to more than medium rare. It will become tough and unpleasant.

Finished kangaroo burgers. Crazy, huh?


On to my final recipe: the chips. A couple of quick notes: this recipe really isn't particularly Australian, as chip recipes go, though I did try to find some potato varieties you would expect to find in Australia. Sadly, you can't get any of those varieties over here, unless you really want to drop 45 bucks plus shipping on a 10 pound bag of "heirloom potatoes." The recipe I used called for Désirée potatoes, which are a red skinned variety. So I had settle for your common, garden variety American red skinned potato, which I guess was a reasonable substitute. Anyway, I've never actually deep fried fries before, so this was a totally new experience for me. Here's how it's done:

Slice your potatoes. It's important to make sure they are uniform thickness so they will cook at the same speed. If you do this in advance, you can stop them getting brown by submerging them in ice water until they are ready for frying.

Make sure your chips are cut to a uniform size.


Now heat the oil. You can tell when your oil is hot enough by sticking the non-stirring end of a wooden spoon into it. If bubbles rise up the wood, the oil is ready.

Pat the potato slices with a paper towel to soak up some of the excess moisture, then dump them in the oil. Be sure to stir them around for a couple of minutes or they will stick to each other and they won't cook correctly.

Deep frying the chips.


When the fries are a golden brown, take them out. Using another paper towel, remove some of the excess oil and add the sea salt.

Take the chips out when they are golden brown.


So even though Martin came home early to help with the barbecue, since I am barbecue-incapable, I somehow managed to get through the entire burger-cooking process without letting on to anyone what kind of meat I was preparing, which was quite funny really since the patties did look pretty strange. I served the burgers on the very flat brioche buns with a generous portion of tomato chutney and a whole leaf of butter lettuce. Martin took a big bite of his and exclaimed, "Wow, these are good!"

"Really?" I said. "You're eating kangaroo."

Nothing really shocks Martin (he's English) but he was definitely intrigued ... after he got over a brief moment of feeling sorry for the kangaroo (personally I think cows are way more deserving of our pity). He ate his burger faster than anyone, then he ate pretty much all of Hailey's, who I don't have to tell you took a tiny little nibble and exclaimed "thank you but I don't like it." Surprisingly, though,the other three kids each finished off their burgers. Surprising because all the stuff I read in advance about kangaroo was pretty much the truth: it's a very strong meat with a gamey flavor. The very strong-flavored tomato chutney really was the best condiment I could have chosen.

The fries were kind of overshadowed by the strange entree, but I thought they were really tasty and totally worth the trouble. The pavlova was a huge hit with everyone--light and crispy on the outside and creamy inside (I don't know if that's how it's supposed to turn out, but between the six of us we managed to put away the entire pan, so I must have done something right).

Overall this had to be one of my favorite Travel by Stove meals, both in the pursuit of ingredients, the challenging preparation and the taste. Plus I still have two kangaroo steaks in my freezer for another time.

Merry Christmas and Happy Holidays everyone!! Next week: Austria.

Thursday, December 15, 2011

Ashmore and Cartier Islands: A brick wall in the middle of the ocean

I have hit a brick wall. I've finally found a nation that has no culinary tradition, not even a modern one (like Antarctica).

This nation is number 15 on my list: "Ashmore and Cartier Islands."

So why is this a problem? Well, quite simply, no one lives on Ashmore and Cartier Islands, and as far as I can tell, no one ever has. These two islands are part of a larger marine reserve that is governed by Australia. It is populated only by non-human species, and unless I am mistaken, none of them know how to cook.

So I could skip Ashmore and Cartier. But I'm not gonna.

Yes, I know, there's really nothing I can do to create an authentic culinary experience for Ashmore and Cartier, because you can't have an authentic version of something that doesn't even exist. But based on what I've read about this area and its history, I feel like I can at least come up with a fantasy meal.

These two dishes are from Indonesia, which has fishing rights on Ashmore and Cartier.


Ashmore and Cartier Islands, as it turns out, are traditional fishing grounds for Indonesian fishermen, who have been using the waters there for centuries to harvest sea cucumber, trochus (a mollusk valued for its shell), shark fin, abalone, green snail, sponges (poor SpongeBob) and clams. Because most of these species were threatened by overfishing, in 1974 Australia and Indonesia drafted a memorandum of understanding (MoU) that allowed "traditional" Indonesian fisherman to continue to use the waters surrounding the two islands, subject to limitations.

Ashmore and Cartier Islands is an external territory of Australia.


So based on this information, I am going to make the huge leap to the following recipe:

Mock Clam Satay

I'm basing this decision on the following:
  1. I can't get sea cucumber or green snail at Safeway
  2. I wouldn't know what the hell to do with a sponge, but I'm guessing they aren't harvested as a food item
  3. Trochus is mainly used to make jewelry and buttons, not food
  4. Shark fin is illegal
  5. I couldn't find any Indonesian recipes for abalone
So by process of elimination, I chose an Indonesian clam recipe. I figured that traditional Indonesian fishermen probably used clam at home ('cause you know, I have great knowledge of the subject, haha), and although the species doesn't match what we can get here in the US I figured I didn't need to be 100% accurate when deciding on a recipe that is 100% inaccurate.

So here we go, the world's only known recipe from Ashmore and Cartier, that I just personally attributed to Ashmore and Cartier even though I lack even a shred of credibility.

Mock Clam Satay (why this is a "mock" satay will become clear)
(from Indonesian Cakes)
  • 1 lb clams
  • 5 shallots, sliced
  • 2 tsp sweet soy sauce
  • Juice of 1 lime
  • salt and pepper to taste

Of course I also have to have a side dish, so I just picked a basic Indonesian fried rice (from Tasty Indonesian Food):

For the rice:

  • 3 cups cold cooked rice
  • 2 tbsp oil
  • 3 1/2 oz cabbage, shredded
  • 4 eggs
  • 2 shallots, chopped

For the spice paste:

  • 3 shallots, roughly chopped
  • 2 cloves garlic, roughly chopped
  • 2 red chillies, seeded
  • 1/2 medium tomato
  • 2 tbsps sweet soy sauce
  • Salt to taste

One more thing: Sweet Soy Sauce, otherwise known as ...

Kecap Manis
(from Food.com)
  • 1/2 cup brown sugar
  • 3 tbsp water
  • 1/2 cup soy sauce
  • 1 star anise pod
  • 1 garlic clove, crushed

First a couple of interesting notes about kecap manis: 1. It seems to be in just about every Indonesian recipe and 2. "Kecap" is pronounced "ketchup." I am told that this is where our word for "ketchup" actually originated, though I find this claim a little puzzling since Indonesian food just isn't that popular in the west, and since there aren't any tomatoes in kecap manis.

But anyway, I did try to find kecap manis in the Asian market down in Sacramento, though I came up empty handed. I found a few bottles labeled "sweet soy sauce" but they didn't appear to be Indonesian, and the ingredients weren't really any more interesting than those in the homemade version (with the exception of some additives like MSG and high fructose corn syrup). So I didn't think that the homemade version would be any less authentic. And since this whole endeavor is basically a fantasy anyway, who really cares about authenticity.

So to make the kecap manis, melt the sugar together with the water over medium heat. Bring to a boil, then reduce heat and let simmer until the mixture becomes a thick syrup.

Simmer the sugar and water until it becomes a syrup.


Remove from heat and cool by setting the whole pot in a larger pot full of ice water.

When the syrup has cooled, add the soy sauce, the star anise and the garlic. Bring back to a simmer and let cool, discarding the garlic and the star anise.

(In case you aren't familiar with star anise, you can find it in most major grocery stores with the ethnic spices, usually packaged in a small plastic bag. I just happened to have some on hand since I occasionally make Vietnamese Pho Bo.)

This is star anise. Each one is about the width of a dime.


When the kecap manis is done, move on to the clams. Now, this is where my world fell apart.

Henry was in a bad mood. He kept clinging to the kitchen gate and crying. Meanwhile, I rediscovered something I learned the first time I tried to make clam chowder: Baby clams are gross.

Yes, I just bought a couple of cans of baby clams for this recipe, because I really couldn't be bothered to cook live clams and take them apart. But when I opened the cans of baby clams I realized what a mistake this was, at least for me. Because baby clams are mostly stomach, and their stomachs are filled with this nasty, pasty, gritty stuff that makes me gag when I eat it. So what did I do? I pulled the guts out of each and every one of those baby clams. It took me about an hour. When I was done I had maybe 3/4 cup of gutted baby clams.

Gutted clams. I won't tell you how I did this, because only a crazy person would try it.


The second problem with the baby clams approach, of course, was size. Satays are supposed to be cooked on a skewer. There's no way you can skewer a gutted baby clam. So I just mixed my clams up with the shallots, kecap manis, lime and salt and pepper.

The basic ingredients for the mock clam satay.


I let this mixture marinade for about 30 minutes, then I sauteed it. So this really wasn't a satay, but all the flavors were there so I consider it only cheating by a little bit.

Sauteing the clams.


So while my mock satay was marinading, I threw the fried rice together. Here's how:

Put all the spice paste ingredients into a blender and pulse until you get a paste. Then shred the cabbage.

The spice paste.


Put the spice paste into a medium hot pan and stir until fragrant. Then add the cabbage and cook for a few minutes.

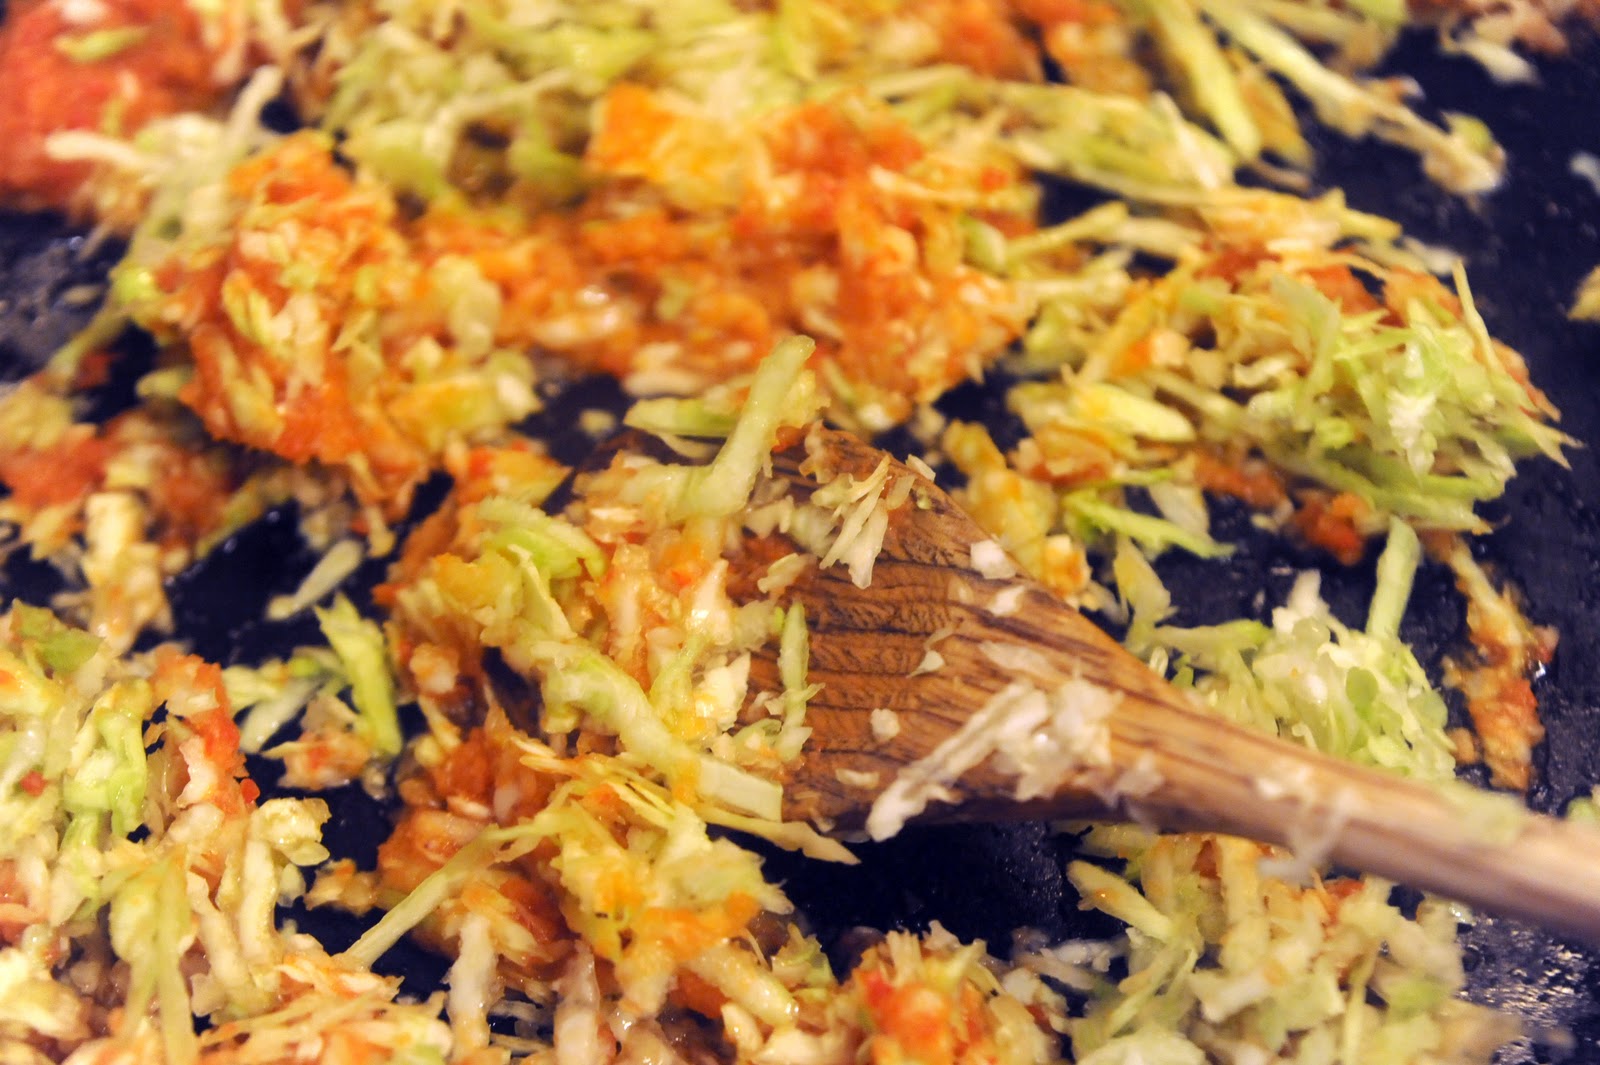
Stir fry the shredded cabbage with the spice paste.


Dump in the rice and add the kecap manis, and stir until blended.

One last step: add the rice and kecap manis.


Finally, while Chinese fried rice is usually made with a scrambled egg, Indonesian fried rice is typically served with a fried egg on top. So fry up a few eggs until the yolks are just firm, and top each serving of rice with a fried egg.

So how did my fantasy meal go over? Not well. I thought it was OK, but almost certainly not worth the effort of all the research I did. I guess I don't really like clams, not even gutted ones.

I didn't give the kids any of the mock satay because there just wasn't enough of it, and I was pretty sure they wouldn't eat it anyway. Predictably, Hailey ate nothing. Natalie had a screaming fit because her egg wasn't hard boiled. Dylan ate both his egg and Natalie's, and nothing else. Henry ate everything. Martin was completely unimpressed.

This would have actually been a do-over if Ashmore and Cartier Islands was a populated nation with a culinary tradition of any kind, but I am excusing my failure this time since I really don't know what I could do differently. Instead I'm looking forward to my next stop, a country that is most definitely populated and most definitely the source of some interesting foods.

Next week: Australia.


Copyright 2023 Becki Robins and Palfrey Media.. Powered by Blogger.

Blog Flux

Blog Directory