
Recipes from Marche, Italy

For this entry, I made two recipes. Neither of them were especially good, but I don't blame the people who posted the original recipes or any of the traditions they came from, I blame myself and my propensity for Googling things that might kill me.

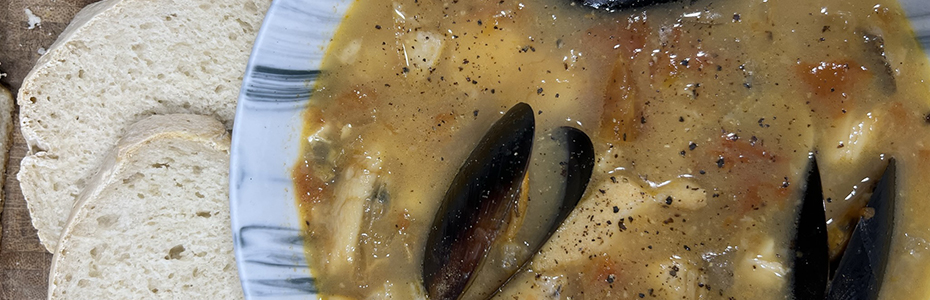
Recipes from Marche, Italy: Brodetto

A seafood stew with mussels and clams, minus the Vibrio.

Recipes from Marche, Italy: Filone Casereccio

An Italian bread that will come out much better than mine did if you use fresh brewer's yeast and steam.

Recipes from Malta

This is actually the third time I’ve cooked a meal from Malta. The first time, I cooked the meal and then just did not write the blog post. Years went by.

Recipes from Malta: Imqarrun

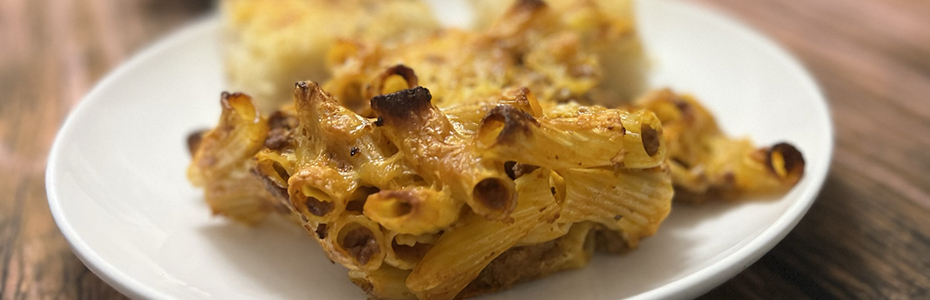
Imquarrum (also called Imqarrun il-forn) is descended from a dish served in Sicily, but the Maltese have adopted it as a traditional staple. The key to making this dish is to be patient.

Showing posts with label Polar. Show all posts

Thursday, April 24, 2014

Recipes from Jan Mayen

Ah yes, the non-countries. I suppose you're still wondering why I do them. Sometimes I wonder, myself. I don't really know how to explain it except to say that I like a challenge. I like to be creative. And what could be more challenging and potentially creative than trying to come up with recipes from places where no one actually lives?

Jan Mayen is another one of those remote islands, where there is actually a small garrison of people living for part of the year--18 people in the winter, and 36+ in the summer. Some of the people living there are Norwegian Armed Forces personnel (Jan Mayen is a Norwegian territory), and the rest of them are employees of the Norwegian Meteorological Institute.

The island is volcanic, about 144 square miles and partly covered by glaciers. You guessed it, it's in the Arctic Ocean. Which of course means that there's not much on Jan Mayen--it has only one exportable resource: gravel. How exciting.

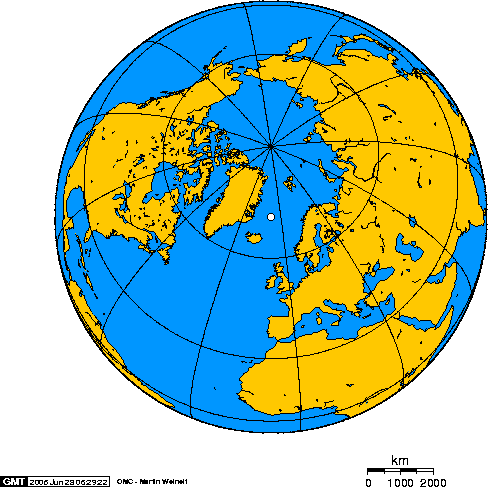
Jan Mayen is that little white circle next to Greenland.

Historically, Jan Mayen was used as a Dutch whaling base and was actually the stage for some really dramatic, movie-worthy stuff during World War II, which I will not actually try to describe here because it's quite a long story (Wikipedia will tell you all about it). Recently Jan Mayen has also been a tourist destination, albeit for only a few lucky tourists, though the Norwegian Government is now limiting landings and camping on the island.

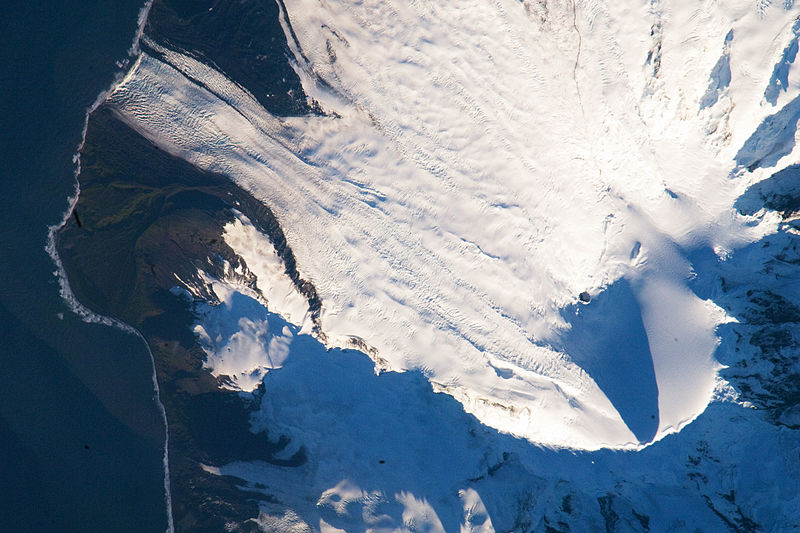
Jan Mayen. Photo by Juergen Kurlvink.

So this left me with a couple of alternatives for finding recipes. I could contact the Norwegian Armed Forces or the Norwegian Meteorological Institute and try to find someone who was stationed on Jan Mayen to see if they would be willing to send me a recipe or two. Or, I could contact Borea Adventures, the company that offered exclusive expeditions to the island before the restrictions were in place.

I decided to contact Borea Adventures first, for a couple of reasons. First, because it's difficult to get anyone from any sort of military operation to take me seriously, and second, because I figured a company that catered to tourists would have a lot better food than the rations provided by the military or by the Norwegian Meteorological Institute.

Often, when I go out in search of recipes for non-countries, I get met with a lot of silence. I guess people look at my emails and then just laugh and click "delete." But every now and then I'm very lucky to find a person or an organization who get back to me right away and seem eager to help. Borea Adventures was one of these. Within 24 hours of my original email I was contacted by Nanný Arna, who sent me this recipe:

Borea Lamb Soup
  • 2 lbs lamb meat
  • 17 cups water
  • 10 1/2 oz yellow beet
  • 10 1/2 oz carrots
  • one onion
  • 7  tbsp mixed thyme, oregano and rosemary
  • 10 1/2 oz potatoes
  • 7 tbsp barley
  • 2-3 tsp salt
  • 2 tsp black pepper
  • 2 boullion
  • bay leaf
This is a recipe that Borea Adventures always serves en route to Jan Mayen, along with a bread made with yogurt instead of yeast:

No Yeast Yogurt Bread

  • 1 3/4 cup whole wheat flour
  • 1 3/4 cup rye flour
  • 3 tbsp wheat germ
  • 2 tsp baking soda
  • 1 tsp baking powder
  • 1 cup plain yogurt
  • 1 cup skim milk or water
  • 1/2 cup honey
  • 1 tsp salt
Now this particular recipe is not one of Borea Adventures'--it comes from Sujana's World. I didn't want to be too much of a pest so I decided to use this recipe instead of bugging Nanný to give me one from the ship's cookbook. This recipe does have a lot of components that other Norwegian bread recipes have, so I thought it would be a good choice. Here's how to make:

Grease a loaf pan and preheat your oven to 300 degrees. Put everything into a bowl and mix until you get a really sticky dough.

Pour the dough into the pan and bake for 1 hour and 40 minutes, checking often (mine only took about an hour 20). Since this isn't a yeast bread it won't sound hollow when you knock on it, so go by how brown it gets on the outside. Cool and slice.


 Now for the soup:

Throw all the ingredients into a pot and cook for 1 1/2 hours. That's it! I let mine reduce down quite a bit by cooking it on a very high temperature in the last 20 minutes or so.

So Martin isn't a huge fan of lamb, which meant I already knew he'd be indifferent about the soup. I loved it, however. The lamb was really tender and the broth, oh my, it was super rich and flavorful. Martin thought there were too many herbs in the soup, but that's because he dislikes leafy herbs more and more the older he gets (he never used to be like that). I however thought they were really good in this soup, though I suppose it wouldn't have hurt to tone them down a little.

The bread was delicious, too, and it paired beautifully with the soup. I was really surprised by how light it was for a non-yeast bread. It had a nice, mildly sweet flavor from all that honey and was just really enjoyable, though my kids of course didn't like it because they don't like any bread that is made of actual whole grain anything. I shouldn't judge, because usually I sort of lean in that direction too, but this was definitely an exception. Best of all, the whole meal was simple, and I needed simple right now.

Anyway if cold Arctic adventures are your thing, please bookmark Borea Adventures. I'm very sure they'll give you a great experience and treat you well, too.

Next week: Japan

Thursday, January 9, 2014

Recipes from Heard Island and McDonald Islands

What do intrepid explorers eat when visiting remote Antarctic islands? If you guessed canned food, you're right! This week is an ode to that very non-gourmet meal: tinned, processed and frozen. And also botulism.

Uh ... yum?

Yes, botulism. I know what you're thinking: Wow, Becki, that's a really appetizing way to start a food blog entry! Don't worry, no one here has botulism. But I think about it every time I buy imported canned food, because I am one of those people who Googles every unlikely thing that might harm my children and then obsesses over it for unnecessarily long periods of time.

This week it was the canned corn beef, which is shockingly expensive--like six bucks a can expensive, and I needed two of them. Happily, I found canned corned beef at the grocery outlet for about half price. Sadly, I noticed after I already bought it that it was imported from South America, and then I started to wonder if the particular South American nation it hailed from had the same food safety standards that we do, and then I learned that said South American nation also had a recent case of mad cow disease that they tried to hide from the world and that gave me something else to worry about.

Curse you, Google.

Anyway, buy American corned beef for this meal. Unless you aren't unreasonably paranoid to the point of it probably being clinical.

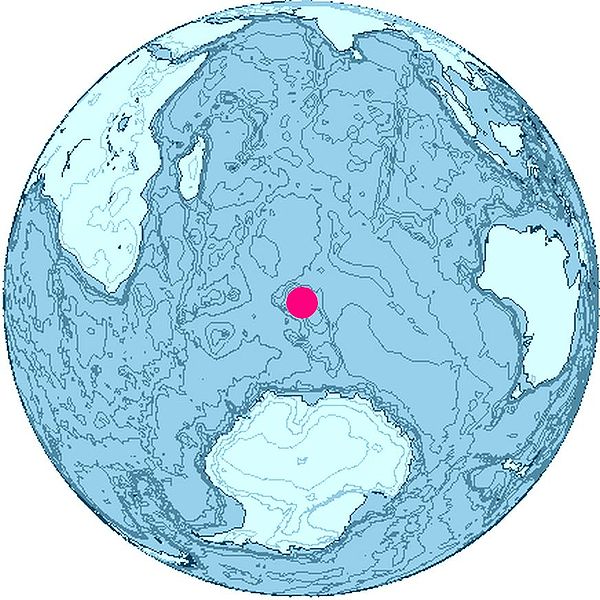
So now I guess we have to stop talking about botulism and bovine spongiform encephalopathy and start talking about why I had to buy corned beef. Because our nation du jour is Heard Island and McDonald Islands, which is another one of those tiny, uninhabited places. This particular island group is an Australian territory located about two thirds of the way from Madagascar to Antarctica, though it is technically in the Indian Ocean. It's roughly 144 square miles and is home to the only two active volcanoes on Australian territory. Historically it was a big sealing settlement, furnishing more than 100,000 barrels of elephant seal oil to the world over a period of about 25 years, until the sealers wiped out all of the seals. Today the seal population on the islands is protected and most species are bouncing back. Those seals are the only mammals that are tough enough to call the islands home, besides the occasional human.
Satellite image of the southern tip of Heard Island. (Image source: NASA)
With the holidays so recently behind me, I actually didn't have a lot of energy to go chasing down scientists and other people who'd spent time on Heard Island and the McDonald Islands. Fortunately, I found a book that provided me with some details about what past visitors have eaten there in the past, this one: Unique & Unspoilt: A Year Among the Natural Wonders of Heard Island (edited by Bernadette Hince). The book details a year-long expedition to Heard Island in 1953, and lists rations and a few dishes that the visitors ate during their time there. 
 
There were no recipes of course, so I tracked down some Australian versions of the dishes and rations listed and came up with this oh-so gourmet menu:

Bully beef stew
(This recipe comes from Mouths of Mums)
  • 2 cans corned beef
  • 2 beef stock cubes
  • 2 potatoes
  • 2 carrots
  • 1 cup frozen corn
  • 1 cup flour
  • 1 tsp baking powder and a small amount of water

Australian Whole meal biscuits
(From a website called "The Discount Travel Site")
  • 1 1/4 cup whole wheat flour
  • 1/2 cup all-purpose flour
  • Pinch salt
  • 2 tbsp sugar
  • 2 oz butter
  • Pinch baking soda
  • 1/2 cup warm milk

Pineapple Betty
(This is an old recipe published on joyofdesserts.blogspot.com)
  • 1 1/2 cups crushed pineapple
  • 1 cup soft bread crumbs
  • 3 tbsp sugar
  • 3 tbsp butter
  • 1/4 tsp cinnamon
  • 1/2 cup pineapple juice

The good news is, food out of a can is easy to prepare. Here's how to make the stew: 

First peel and dice the carrots and potatoes. Make sure the carrots are cut into suitably large chunks so you don't have to eat them.

Now boil the potatoes and carrots with the stock cubes and enough water to cover until they are almost cooked through. 

Now, I also put my beef in at this point because of the whole stupid botulism thing (botulism toxin is destroyed by high temperatures) but my beef disintegrated, so I don't recommend this if you are reasonably sure your corned beef is botulism-free.

Next, mix the flour with the baking powder and add enough water to make "doughy chunks." What you're doing, really, is making some very basic dumplings to put in the stew. 
 Now add the corned beef and the frozen corn and heat through. In the last five minutes, add the "doughy chunks" and let them cook until they're puffy. All done!
Meanwhile make the biscuits. First, preheat your oven to 375 degrees. Sift together the whole wheat flour with the all purpose flour and salt. 

Add the sugar. Now melt the butter and stir in the warm milk, then blend with the dry ingredients until you get a nice soft dough. 

Roll into a 1/4 inch thick sheet and cut into rounds with a biscuit cutter. Transfer to lightly greased baking sheet and bake for 20 minutes or until golden.
Now make the dessert, which is super simple: just mix the pineapple with the bread crumbs, sugar, cinnamon and juice. 
Transfer to a buttered baking dish and dot with pieces of butter. Bake in that same 375 degree oven until golden.
Now you're eating like the king of Heard Island and McDonald Islands, of which there is no actual king so interpret that how you want to.

Here's what we thought: the stew looked downright nasty. I'm not going to describe it, because you've seen the picture. But it looked gross. When Martin saw it he made a sound that I can only describe as a mortified grunt.

But it didn't taste bad. It was actually pretty decent tasting, in fact. Definitely not something I would expect at a four star restaurant, or even a two star restaurant, but perfectly edible. Martin went back for seconds so there you go. The biscuits were also perfectly pleasant, especially with a little honey though they didn't need it since they were already sweet. And the pineapple Betty was fine, too, in fact as far as desserts go it was quite a nice switch from all that rich chocolate stuff we've been eating for weeks.

So yeah, it was fine. And you have to admit it at least made for an entertaining entry, I hope. And no one got botulism, either.

Next week: the Holy See (Vatican City)
For printable versions of this week's recipes:

Thursday, July 25, 2013

Recipes from the French Southern and Antarctic Lands (TAAF)

So I'm afraid I'm sort of limping onto the screen with this entry, because I had very little joy researching recipes for the French Southern and Antarctic Lands. Because unlike the mainland of Antarctica, where I encountered several friendly people who were more than happy to share recipes, and places like Bouvet Island (also in the same general area) and Europa Island, I could not find a single person associated with the TAAF who could even be bothered to respond to my emails. One blogger even proclaimed, "I promise to respond within 24 hours." Ha! Snark.

I really don't know if you're supposed to photograph a lobster belly side up.

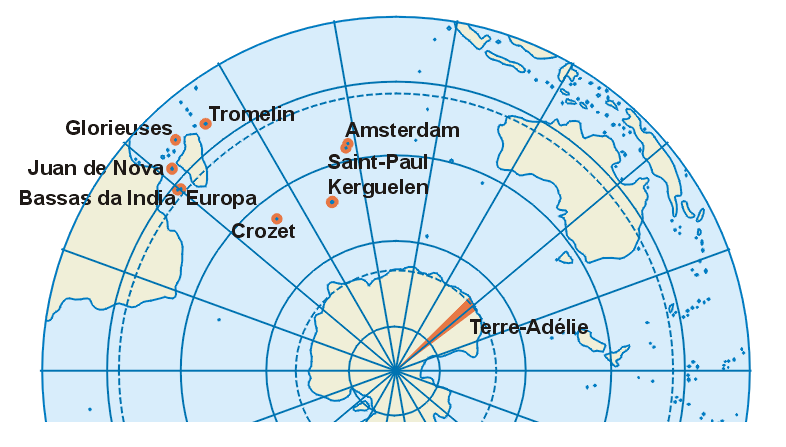
So after many weeks of an empty email box—well, empty except of course for all that spam—I finally took matters into my own hands. I spent hours, yes literally hours, researching recipes from the French Southern and Antarctic Lands. I think I visited every single English and French website that had any mention of Kerguelen, St. Paul and Amsterdam Islands, Crozet Islands, Adélie Land or the Scattered Islands. I also searched for Terres australes et antarctiques françaises (TAAF) all with, of course, "recettes," which is the French word for "recipes."

Penguins on Adelie Land. Photo Credit: AntarcticBoy

First of all let me tell you about the TAAF, known by us English-speakers as the French Southern and Antarctic Lands. It is one of the few sad remnants of the French colonial empire, which includes the aforementioned islands and a handful of temporary residents, mostly from the scientific community. The TAAF has a few meteorological and geophysical research stations, some extinct volcanoes, a small merchant marine fleet and penguins. But not really any recipes.

So here is what I was reduced to, a single recipe that I know to be from the TAAF, which was posted on a blog entitled Full of Stuff and Recipes, at least according to Google Translate. The poster writes that this recipe was prepared for her husband and his colleagues while they were stationed on the TAAF, so it is therefore the only one of the following three recipes that I can say for sure came from this region. Here it is:

Buns of TAAF
  • 6 tbsp warm milk
  • 1 tsp sugar
  • 2 1/4 tsp active dry yeast
  • 8 cups all-purpose flour
  • 2 tsp of salt
  • 2 2/3 cup sugar
  • 12 whole eggs
  • 2 2/3 cup butter
  • 1 egg yolk mixed with 1 tbsp water
Now let it be known that I don't think mine came out right. It was good, but I suspect that it wasn't exactly right. Anyway …

I gather from what I read, which was every single webpage currently available on the subject, that they eat a lot of lobster in the TAAF. Lobster is very available there, because it is one of the area's primary fishing resources. So with that in mind, I chose this recipe:

Lobster tails à la Plancha

For the lobster:
  • 2 to 4 lobster tails
  • 1/4 cup extra virgin olive oil
  • Sea salt and freshly ground pepper to taste
  • Lime butter
For the marinade:
  • 1/2 cup virgin olive oil
  • 1/2 oz whole star anise
  • 5 cloves garlic, minced
  • 3 sprigs basil, chopped
  • 3 sprigs lemon thyme, leaves only
  • Juice of 1 lime, freshly squeezed
  • Sea salt and freshly ground pepper
Now here's the thing about this recipe, it came from a chef whose father was stationed for five years on the TAAF. But I could find nothing claiming that this recipe had ever been eaten on the TAAF. I suspect not, but it's as close as I could come.

Next:

Leek Pie and Blue
  • 2 tbsp butter
  • 4 leeks, white and light green parts only
  • 4 oz good quality blue cheese
  • 4 eggs
  • Salt and pepper to taste
  • 1/2 cup cream
  • 2 sheets puff pastry
  • 1 egg yolk mixed with 1 tbsp water
Now here's the other thing--this recipe came from a website that called itself an Adelie Land wiki, and included a section with a few recipes. Now, were these Adelie Land recipes, or were they just random recipes that someone associated with the site happens to like? No idea, because the website didn't actually say so. So there you go.

And that was my menu. Do leek pie and lobster go together? Hmm. At this point I really didn't care.

Anyway here's how to make: First make the marinade for the lobster, since you are advised to let the tails marinate overnight. Of course I didn't, because I don't have that kind of capacity for planning.
 
Crush the star anise with a mortar and pestle or in a spice grinder. Mine didn't get very powdery and actually looked like it had little wood chips in it, which I didn't think would be very pleasant to eat. So I poured the lime juice and olive oil in with the anise and let it soak for about 15 minutes, then I strained it and added the other ingredients. I got plenty of flavor this way, without having to eat bark.

Anyway do as I did or simply add the anise to the garlic, thyme and basil and pour the olive oil and lime over. (If you don't have lemon thyme, use regular thyme with a little bit of lemon zest added.) Now pour over the bellies of the lobster tails and let marinate over night.

When ready to cook, remove the lobsters from the fridge and cook in at 465 degrees for 5 to 8 minutes, or until an internal thermometer reads 140 degrees. Serve with melted lime butter for dipping.

 Hmm, not one of my better photos.
Now for the Buns of TAAF, which have an admittedly awesome name even if it is because Google Translate is not really very good at translating. (The other day I found a French recipe that listed "chipmunks" as one of the ingredients. Yay, Google Translate!)

First dissolve the sugar in the warm milk, then add the yeast and let stand until frothy. Mix together the rest of the ingredients and add the yeast mixture. Knead until you get a nice soft dough. (Here's where I went wrong: mine was really sticky. I kept adding flour until the texture was more dough-like, since the recipe didn't say it should be sticky. I don't know, though, maybe it was supposed to be, and adding all that flour turned it into something else. Your call.)

Let the dough rise for an hour or so. (Mine didn't rise--another problem. My milk might have been too warm when I added the yeast.)

Punch down, then divide into two equal sized pans. Let rise again until doubled in size. Brush tops with the egg wash, then bake at 350 degrees for 30 minutes or until golden.

This was really more scone-like than bread-like.

And the pie:

Melt the butter in a pan and saute the leeks until soft.

In a small bowl, beat the eggs together with the salt and pepper and cream.

Line a casserole dish with a sheet of puff pastry. Spread the blue cheese on top, then add the leeks.

Pour the egg mixture over and cover with another sheet of puff pastry. Brush with the egg wash and bake at 435 degrees for 25 minutes.

Done! So here's what we thought:

Naturally I did not feed lobster to my children. Because that would be stupid. So Martin and I ate this meal alone.

The lobster was yummy but probably would have been even yummier if it had, you know, marinated overnight. But I did like that anise marinade a lot, especially my non-woody version. Lobster tails, though, as they are sold at Safeway anyway are ridiculously small. I got maybe two bites out of mine and then it was over.

I liked the leek pie; Martin thought it was too doughy. I guess I could have baked the bottom half of the pie first so it would puff up more, but I didn't bother. It certainly would have improved the pie but I didn't think it was bad the way it was. Because you really can't go wrong with blue cheese, can you?

We really liked the buns of TAAF, but the way I made them they were really more like scones. They would have been nice with some strawberry jam and clotted cream. I served them as a dessert, and the kids got pieces in their lunches for a couple of days. Yum!

So that's another non-country checked off my list. Now I will sit back and hope that someone who has actually lived on the TAAF reads my blog and finds it in his/her heart to send me actual recipes from the region.

Next week: The Gambia

For printable versions of this week's recipes:

Tuesday, October 30, 2012

Recipe from Bouvet Island (revisited)

One of the best things about having an international food blog is that it gives me an opportunity to talk (virtually, anyway) with all kinds of interesting people, some of whom live in or have visited some truly remote places. Of course the other edge of that sword is that it's often really difficult to reach some of those people in the first place, which makes small countries and remote locations some of my biggest challenges.

You may remember how much trouble I had with Bouvet Island, which is an unoccupied island near Antarctica (read more about it in my original Bouvet Island entry), a place so remote that only a handful of people have actually ever set foot on it. When I was researching that location, I focused on a yacht-for-hire named The Hanse Explorer, which is one of the few ships that regularly sails near Bouvet Island. I tried in vain to reach a chef or even an administrator-type who might be willing to share a recipe or two, but I was sadly thwarted by what I'm guessing was my overall unimportance in the grand scheme of people who rent out luxury yachts for a living. So I had rely on a few vague mentions about the sushi served on board when coming up with my menu. Don't get me wrong, I love sushi, but authentic it was not.

So imagine my delight when a few weeks ago I was contacted by Greg Hofmeyr, who has actually been to Bouvet Island several times as part of a research team studying seals and seabirds. While on Bouvet, Greg and his team stayed in small cabins or tents which had, as you might imagine, very limited cooking facilities. But based on the description of some of their meals, they still managed to eat like kings. Well, like kings living in small cabins or tents.

Greg described a number of dishes, many of which had Norwegian influences, but the recipe he passed along was for a very unique sandwich he calls a "Bouvet Island Special." (Credit for this recipe goes to Greg's teammate Bianca Harck.)


I have to say I feel privileged to have had the opportunity to make and share this recipe, because unlike any of the mostly uneducated guesses I made at Bouvet Island cuisine, this is truly a Bouvet Island recipe--prepared and eaten on the island itself. So are you ready? Here it is:

Bouvet Island Special

  • Oversized loaf of home baked whole wheat bread*
  • Butter or margarine
  • Large salami, preferably reindyrpølse (reindeer salami)
  • Canned pineapple rings
  • Cheddar cheese, sliced thickly
  • Chutney, preferably Mrs Balls
* I used this recipe, which I didn't copy here because it's not a Bouvet Island recipe. And also because I couldn't be bothered. :)

OK, so you know me ... I try not to do these meals halfway and I usually make at least an effort to use the ingredients the original recipe calls for. So I looked for reindeer salami and actually found some on a couple of different websites. Sadly, though, we are on a food budget and I just couldn't justify spending 20 bucks on the salami and another 35 shipping it. As much as I really did want to try eating reindeer salami.

I was, however, able to locate some Mrs Balls chutney online for not very much money, which was awesome because I love chutney and it certainly isn't going to go to waste. It did take forever to arrive, though.

So finally with all ingredients in place I put this together for Martin and I to eat for a Sunday lunch. Here's how it's done:

Slice the bread thickly and butter both sides.


Layer on the cheese and salami and top with a pineapple ring.


Slather some chutney over the butter (and I mean slather) and wrap the sandwiches in aluminum foil.

Now take your foil packets and put them in a frying pan over high heat (alternately you could do these on your barbecue). Check to make sure the bread is toasted and the cheese is melted.

Now you can put the packets in your backpack and go chasing after seals. Or if you're not a marine mammal biologist, you can just open them up and eat them in the comfort of your dining room or on your deck. You know, in weather that does not threaten to turn your extremities blue.

I have to admit to being a little skeptical about these sandwiches. In fact when I repeated the recipe to a friend of mine, she went "ew!" I guess it's something about the pineapple and salami combo that just puts off us Americans, though why we eat pineapple and cottage cheese I will never truly comprehend.

But I like to be adventurous, so I tried them and guess what ... Not only were they seriously tasty, they were also exactly the sort of thing I'd want to be eating if I was chasing seals around a frozen and barren wasteland. They were warm and really filling and were a nice combo of sweet and savory.

So I just want to say "thanks" to Greg for going to the trouble of sharing this recipe with me. Greg, by the way, is Curator of Marine Mammals for the Port Elizabeth Museum at Bayworld in South Africa, which didn't really have anything to do with his Bouvet trips but deserves a plug anyway since they have such a helpful guy working for them.

I hope readers will make this recipe since I'm pretty sure it is the one and only authentic Bouvet Island recipe now available to the public. If you do, be sure to leave a comment.

Coming up on Thursday: Comoros

For a printable version of this recipe:

Thursday, May 10, 2012

Recipes from Bouvet Island

Every now and then, as you know, I've had to get creative with my entries. This only happens when I run into a nation that isn't really a nation, like Ashmore and Cartier, which is an uninhabited nature preserve, and Bassas da India, which is basically just a bunch of barren islets off the coast of Madagascar. Usually I can find help with these psuedo-entries, which I only leave on my list because 1) this blog is almost as much about geography as it is about food and 2) I like challenges. This week, sadly, I kind of had to go it alone, though it wasn't for lack of trying.

Our destination this week is Bouvet Island, which is an Antarctic volcanic island located in the south Atlantic ocean. It is more than 1,500 miles from South Africa, its nearest populated neighbor, and over 1,000 miles from Queen Maud Land, Antarctica, where there is a Norwegian research station. Bouvet Island holds the impressive distinction of being the "Most Remote Island on Earth," which means, of course, that it has no population to speak of--no researchers, and only the occasional bold adventurer. And penguins.

Bouvet Island, a tiny spec thousands of miles from anywhere.


Bouvet Island is a dependent territory of Norway, which I find a little funny because as far as I can tell it's a pretty useless chunk of ice and rock that may hold some interest for science, but is mostly useful in its ability to give well-financed explorers a chance to, well, check "The Most Remote Island on Earth" off of their bucket list. This means that despite its remoteness, Bouvet Island is a destination, and destinations always have purveyors willing to sell someone the experience of traveling to that destination, and those travelers of course need to be fed.

Bouvet Island, the most remote island in the world.


So after only a little bit of research on the subject, I hit on a ship called the "Hanse Explorer," which among other things takes small groups of people to remote destinations such as Antarctica and, yes, Bouvet Island. The Hanse Explorer is an "icebreaker" ship that was "purposely built for Arctic/Antarctic Exploration," but this ain't no barebones research vessel. This is a luxury yacht that just happens to be outfitted for very cold, very remote destinations.

And so began my fruitless email campaign. I emailed the charter company, several people who have posted online accounts of their Hanse Explorer journey to Bouvet Island, and I spent/wasted quite a lot of time waiting for people to get back to me. Alas, only one person did, and he was kind enough to forward my message along to the chef onboard the Hanse Explorer, which briefly made me think I'd hit the jackpot. Sadly, though, I am but a lowly blogger, and coughing up $115,000 a week for a trip to Bouvet Island is neither on my to-do list nor on my within-the-realm-of-any-kind-of-possibility list, which I suppose ranks me fairly low on the scale of people worth getting back to. So I never heard from the chef, or from anyone else involved with the Hanse Explorer's charter business.

I did, however, during the course of my deep scrounge of online resources, find several references to the sushi served on board the Hanse Explorer. I was also lucky enough to find a single recipe for one of those sushi rolls, transcribed from a German-language article about the galley on board the Hanse Explorer. The other two recipes I decided on were a basic tuna nigiri, because what sushi spread doesn't have one of those, and a spicy tuna roll recipe that came from a chef who works on board a different yacht. A stretch, I know, but hey, these non-country entries are usually mostly fantasy anyway.

My fantasy menu from Bouvet Island.


Fortunately I've made sushi a few times before, so the prospect of doing so again wasn't that daunting. I already had a sushi mat, serving boards, a rice paddle and a nigiri mold. The only thing I didn't have were the chopsticks, because Dylan recently turned all of my nice chopsticks into Harry Potter wands. So I had to pick up a few of those but after that I was mostly ready to go.

Before you can make sushi, you have to make sushi rice. This is Alton Brown's sushi rice recipe, halved. It makes exactly two sushi rolls and four pieces of nigiri (enough for two pretty decent sized meals); if you're going to feed a bigger crowd you'd need to double it, but since sushi isn't a terribly kid-friendly dish I figured the halved version would be more useful.


Sushi Rice

  • 1 cup sushi or short grain rice
  • 1 cup water
  • 1 tbsp rice vinegar
  • 1 tbsp sugar
  • 1 1/2 tsp kosher salt

Next, the semi-official Hanse Explorer sushi roll, transcribed from a German article, which I've decided to call a Polar Roll. I've had to guess at the measurements but I figured on them being pretty similar to a California roll.

Polar Roll

  • 2 tbsp fresh or canned crabmeat
  • 1 tbsp mayonnaise
  • 2 sheets nori (dry seaweed)
  • 1/4 cucumber, cut into thin spears
  • 1/4 apple, peeled cut into thin spears
  • 1 cup prepared sushi rice

Next is a basic spicy tuna roll recipe, which I have taken the great stretch of including in the Bouvet Island entry based solely on the fact that it comes from a chef who works onboard a yacht, although not the Hanse Explorer or any other Bouvet Island-destined ship.


Spicy Tuna Roll
(This recipe comes from Victoria Allman)

  • 1 tsp mayonnaise
  • 1/8 tsp wasabi
  • 2/3 lb fresh tuna, diced fine
  • 2 sheets toasted nori
  • 4 tsp white sesame seeds
  • 2 tsp black sesame seeds
  • 1 cup prepared sushi rice

And finally, almost every sushi spread I've ever seen includes a basic tuna nigiri, and here's the recipe:

Tuna Nigiri

  • 4 oz ahi tuna (I used albacore, because the co-op didn't have ahi)
  • 1/2 tsp prepared wasabi
  • 1 cup prepared sushi rice

A couple of notes: if you're going to make all three recipes using the sushi rice measurements above, you will need to halve the roll recipes, which will give you one of each roll. Otherwise the rice amount will be just enough for one of the roll recipes and the nigiri.

You do need to make the rice ahead of time so it will have time to come to room temperature (important!), so let's start there.

First a quick note: don't try to substitute long grain rice in this recipe; you need to use sushi rice or your sushi won't hold together.

This is sushi rice. See how short the grains are?


First rinse the rice in a fine mesh strainer until the water runs clear.

Stop rinsing when the water is no longer cloudy.


Put the rice and the water in a small saucepan and turn on the heat. Bring to a boil, then cover and reduce heat to low. Simmer for 15 minutes, then remove from the heat and, without taking the lid off, let stand for 10 minutes.

Now mix the vinegar with the sugar and salt. You can use a small saucepan to heat the mixture, or you can just pop it into the microwave for 20 or 25 seconds.

Put the rice in a bowl and pour the vinegar mixture over it. Mix thoroughly. Your goal is to make sure that the vinegar/sugar/salt mixture covers each grain of rice.

Coat the rice with the vinegar mixture.

Now let the rice stand until it reaches room temperature.

When the rice is ready, start on the spicy tuna rolls. If you've never made sushi before relax, it's actually not difficult.

First mix the tuna with the wasabi and mayo. Set aside.

This spicy tuna roll is made with albacore, mayo and wasabi.


Now cover your sushi mat with plastic wrap to prevent sticking, and lay it on your work surface so the slats are horizontal. Get a little bowl of cold water and place it next to the mat. Now take one sheet of nori and place it shiny-side down on the mat.

For reasons unknown, my stupidly expensive organic nori came in half sheets,
so I had to lay two down side by side.


Grab a handful of rice and spread it over the nori sheet, using the water in the bowl to keep your fingers wet, which will make it a lot easier to get the rice into the right place. Yes, the rice is supposed to be that sticky. If it's not all over your hands and refusing to come off, then you haven't made it right.

Put the rice on the nori and use your fingers to spread it around.


Try to get the rice as close to the edges of the nori as you can, while leaving a half-inch or so strip at the top. Sprinkle the white and black sesame seeds evenly over the rice.

When the rice covers the nori, sprinkle on the sesame seeds.
I left a little too much space at the edges so I had to trim my rolls when I was finished.


Now carefully lift the nori sheet and turn it over, so the rice is facing down and the nori is the top layer.

Flip the sheet over (don't worry, the rice sticks very well). See that seam?
If you are using a full sheet of nori you won't have to worry about that.

Spread a thin line of the tuna mixture across the length of the nori, a couple of inches from the bottom of the sheet.

Now add a strip of tuna mixture.


With your sushi mat, roll the nori sheet away from you, pressing down with the mat to make a tight roll. You'll need to keep repositioning the mat and the plastic wrap so it doesn't get rolled into the sushi.

Roll away from you, pressing down tightly with the mat.


Keep rolling, using the mat to make the roll tight. When you get to the end, remove the mat.

Cut the roll in two, then cut each of the halves in two. Now cut each quarter in two. You should have eight evenly sized pieces.

Cut the roll into eight pieces.


The polar rolls are made in almost exactly the same way:

Mix the crab with the mayo. Set aside. Lay down the nori on your sushi mat and cover it with a layer of rice. This time you don't need to flip the nori over. Just lay the crab mixture down in a thin strip over the rice, a couple of inches from the bottom of the nori sheet. Now put the cucumber and apple strips over the crab, horizontally.

Lay down the crab mixture, the apple and cucumber.


Roll the sushi up in the same manner as you did the spicy tuna rolls, and cut the roll into eight pieces.

Finally, the nigiri, which is pretty simple if you have a mold.

Press the rice down into the sushi mold and transfer to your work surface. If you don't have a mold, you can just shape the rice using your hands.

My mold makes pretty thick nigiri.

Put a dab of wasabi on top of the rice.

Add a dab of wasabi ...

Now lay a thin slice of the tuna over the rice. Done!

... and cover with a slice of tuna.


Serve your sushi with pickled ginger, wasabi and soy sauce on the side.

So obviously, I did not feed this to my children, because it's way too much money and work to waste on the unappreciative. As for my opinion, well, I love sushi, and it's pretty hard to screw up since you can't overcook it or anything. The apple was something I've never had in a sushi roll, and I thought it was a nice addition. I do like sushi that has a little bit of crunch.

As for the spicy tuna, I thought that using wasabi to make the roll spicy was a little redundant, since most people eat their sushi with wasabi anyway. When I've made spicy tuna in the past I've used Sriracha chili sauce, which is what I'll also do the next time I make spicy tuna.

Martin enjoyed his dinner too but for the most part I think we were both underwhelmed—not by the sushi itself, because as long as the fish is fresh sushi is almost always yummy—but by the non-uniqueness of it. I do wish I'd heard back from someone on the Hanse Explorer, but since these pseudo-countries are really just little bits of culinary fiction, I guess I can't complain too much.

Next week: British Indian Ocean Territory

For printable versions of this week's recipes:


Copyright 2023 Becki Robins and Palfrey Media.. Powered by Blogger.

Blog Flux

Blog Directory